


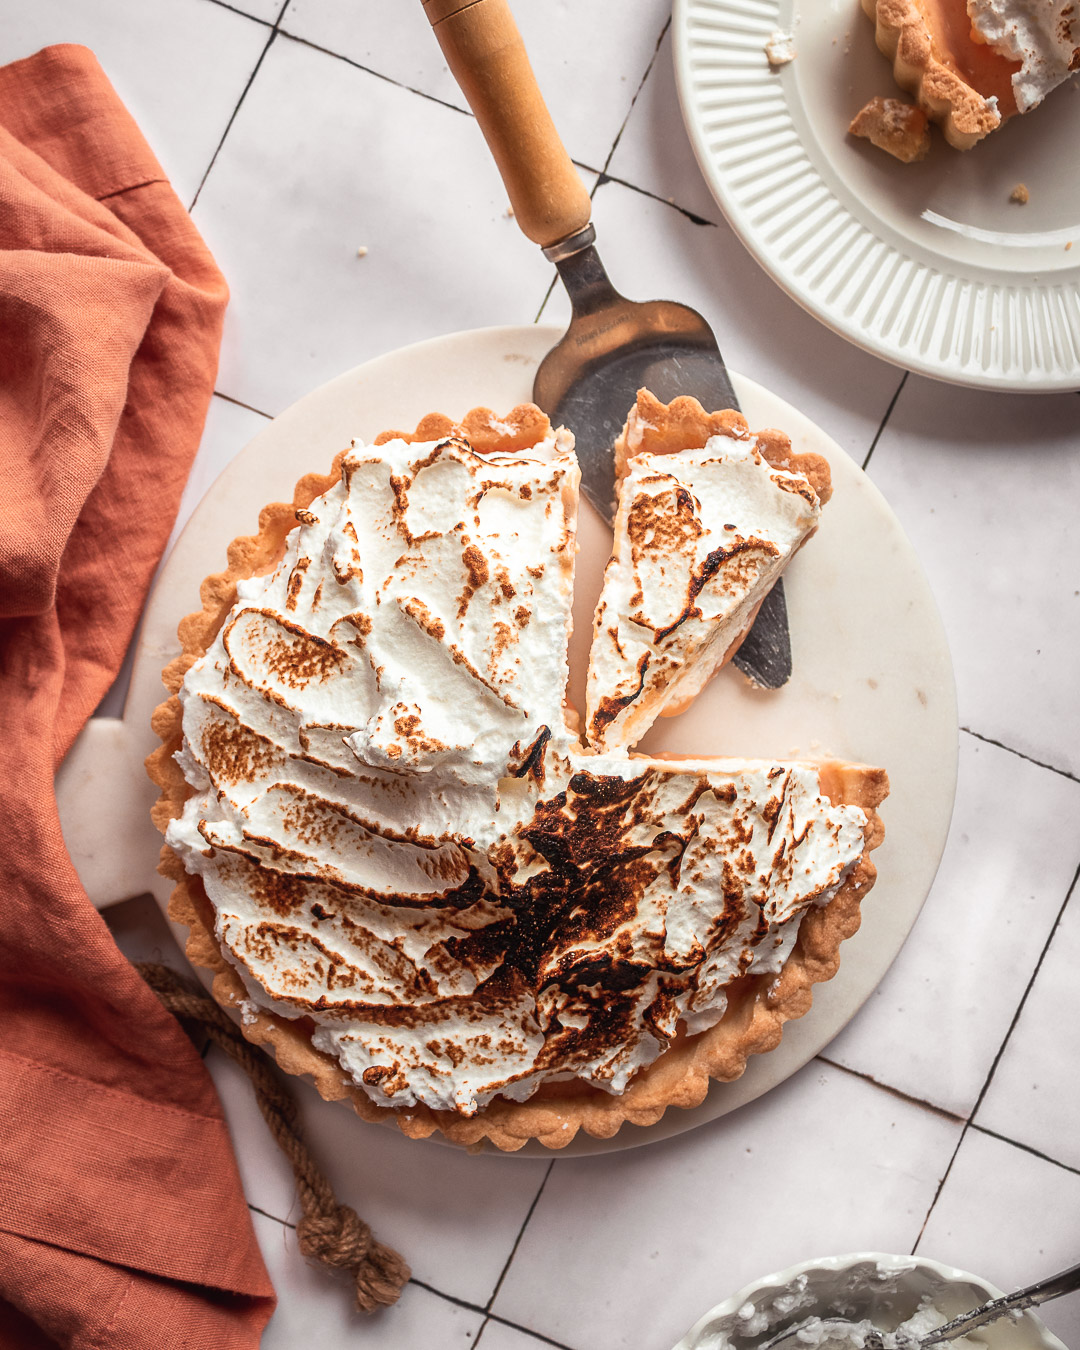


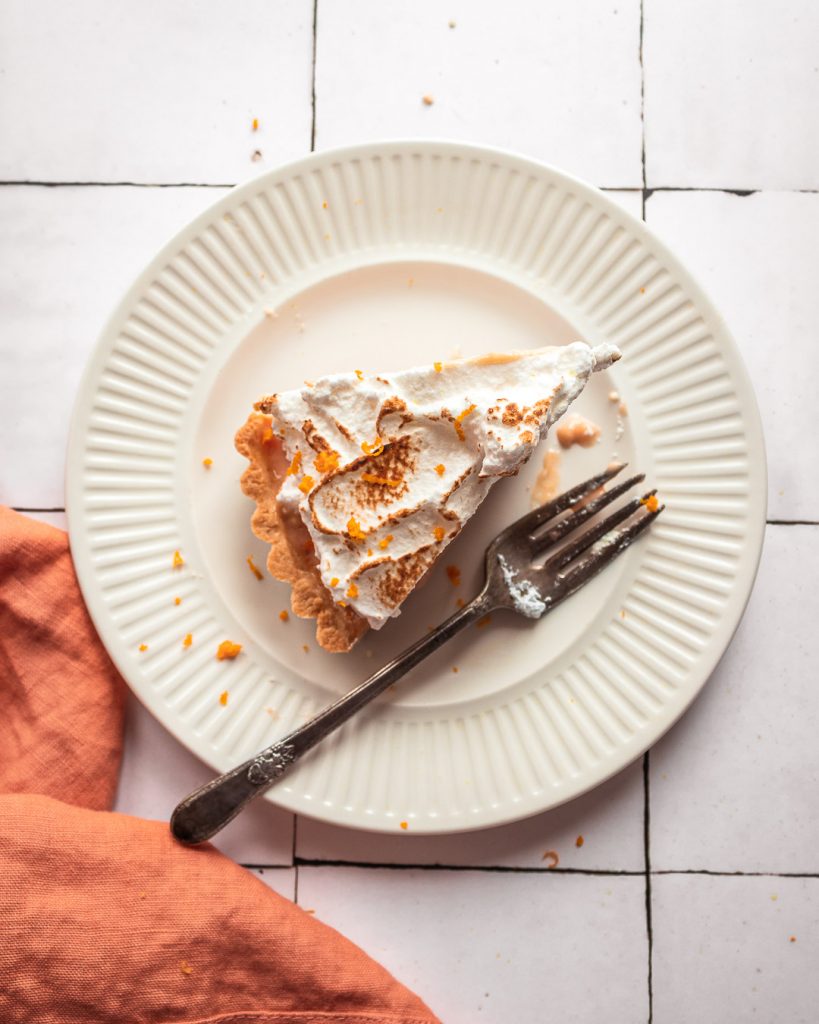
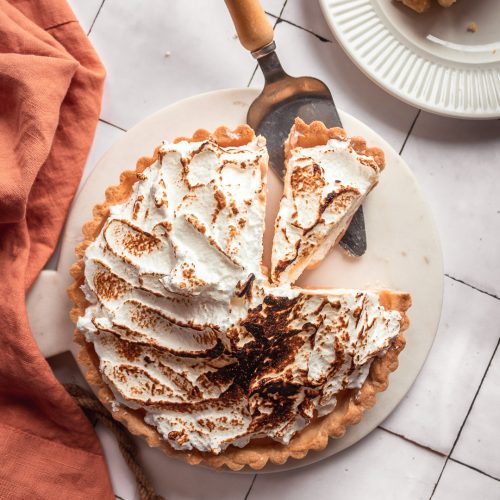
This summery blood orange meringue tart has a flaky homemade sweet crust, tart orange curd filling, and a fluffy brûléed meringue topping.
First recipe of 2021, and we are getting zesty! January is officially citrus month (I didn’t know this was thing!), so to start, we are exploring blood oranges! If you can’t find blood oranges at your grocery store, Cara Cara orange always work fantastic and still have that pink-y color!
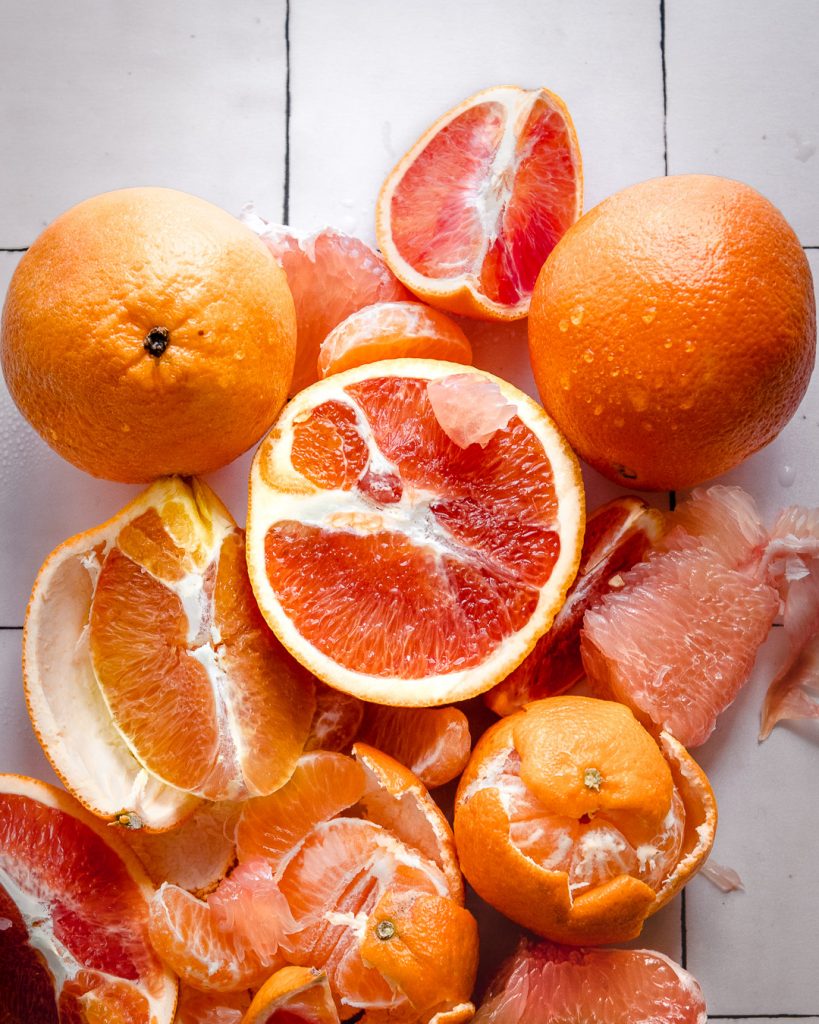
what are blood oranges
A blood orange is a citrus variety. From the outside it looks just like a classic navel orange, but slice into it and you’re greeted with gorgeous crimson almost “blood-coloured” flesh. It greatly differs in taste as well! Rather than a tangy, almost sour taste, blood oranges are very sweet. At peak ripeness, they taste almost-like raspberry lemonade. YUM!

What is a Blood Orange Meringue Tart
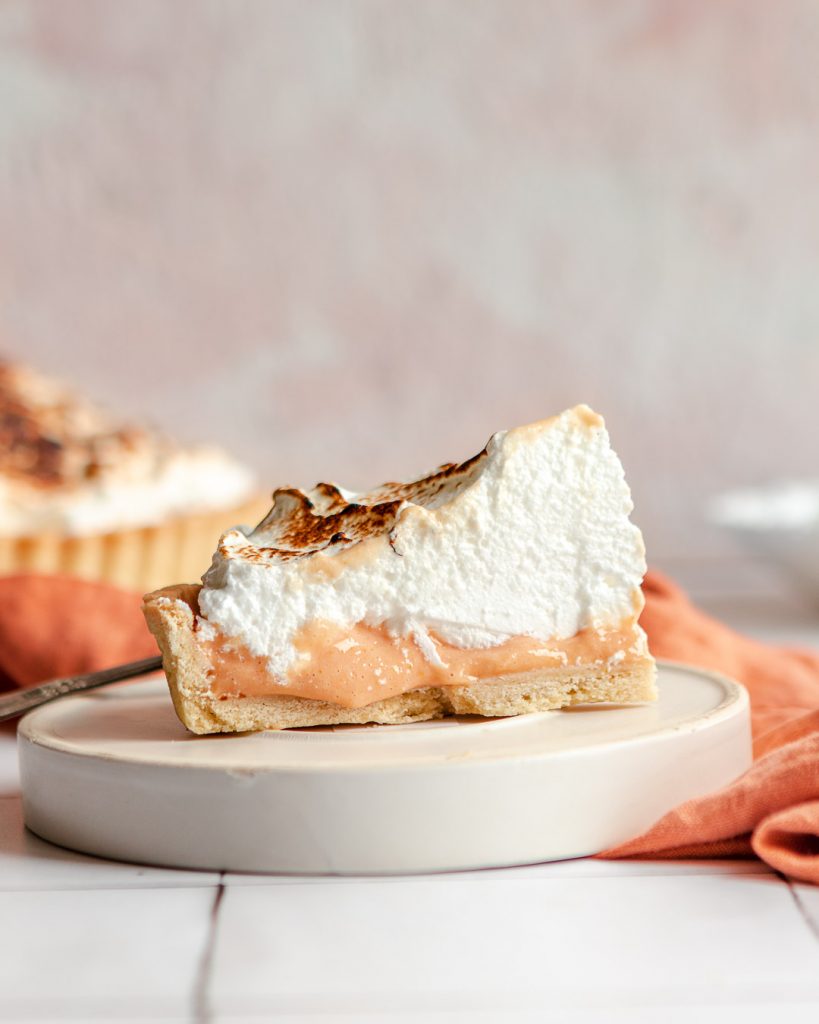
This blood orange tart is VERY similar to lemon meringue pie. Almost identical except for the flavoring of the filling. There are primarily 2 ways to make blood meringue pie: baked or chilled. I found that the chilled method is easier. The baked methods also yield delicious results, but is much more finicky as the meringue has a tendency to weep.
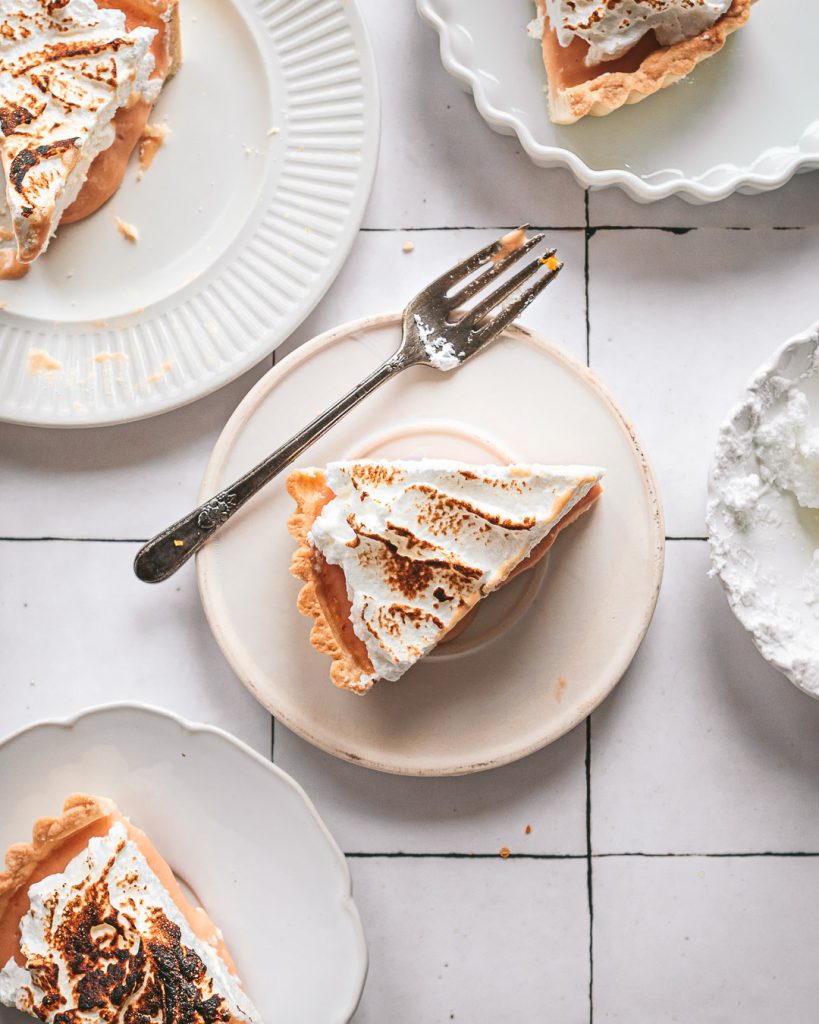
YIELD: This recipe makes one 8 inch tart.
TEXTURE: This blood orange tart is crunchy, creamy and fluffy all in one bite! The brûléed meringue has a crunchy exterior while being marshmallow-like on the inside.
FLAVOR: Blood oranges are not as sour as regular oranges, so the filling is mostly sweet with a slight tang.
LEVEL OF DIFFICULTY: Intermediate. I won’t say this is “easy as pie” hehe, but I will say it is VERY do-able. The trickiest part of this recipe is getting the meringue consistency right but as long as you use a temperature thermometer and follow the steps it will be easy.
how to make blood orange meringue tart
I know this recipe can seem tedious due to the amount of time, but it can be broken up into sections (check recipe notes of details on how to do this).
1. Blind Bake crust: this recipe uses Pâte Sucrée: a delicate sweet crust perfect for fruity fillings. Get the recipe here which includes step-by-step photos!
2. Make Blood Orange Curd Filling: Curd is a thicken filling made of tempered egg yolks, flavoring (blood orange), sugar and a thickener (cornstarch or arrowroot). The result is a creamy texture that holds together when sliced. I like my filling more runny, so I use less cornstarch, but you can add more or less depending on your preference!
3. Fill Tart and Chill: This is why this recipe is so long. It’s mostly chill time. TRUST ME. You do not want to rush this stage. Don’t put it in the freezer, this will ruin the texture of the baked crust.
4. Whip Italian Meringue: Unlike French meringue, Italian meringue is “cooked” making it more safe to eat. More on this below, and why this meringue is the best for this recipe.
5. Top chilled tart and brûlée! Brûléeing seems completely unnecessary, but it makes the meringue crunchy and it’s fun!
Tips and tricks for making Blood Orange Meringue tart
1.Blind Bake the Crust: Since the tart is not baked, it’s extremely important the tart is fully blind-baked before. For more tips and trick read this recipe.
2. Tempering the Curd Filling: Tempering is a process in which cold ingredients are incrementally introduced to hot ingredients to gradually increase their temperature. The cool egg yolks in the filling are tempered by adding simmering orange syrup gradually so the eggs are not “shocked” by the change in temperature. If the eggs are not tempered they will curdle upon contact with hot substances.
3. Use Italian Meringue: There are three different types of meringue (French, Swiss & Italian), but Italian is the most stable because the egg whites are cooked with a hot sugar syrup. Boiling the sugar separately completely dissolves the sugar granules. When whisked with the egg whites, it creates a smooth and glossy texture. This meringue is least likely to weep (pool liquid) when spread over a cold filling.
Tips for making fool-proof Italian Meringue
Italian meringues can be intimidating, but they are actually easier and better than French Meringues. As long as you prepare all your ingredients and use a thermometer you’ll get perfect Italian Meringue!
- Prep Ahead: Italian meringues come together very quickly, so prep all the ingredients before.
- Only egg whites: Make sure there are no streaks of yolk! The tiniest bit of egg yolk can cause a meringue to fail. The best way to separate egg whites is to crack all the eggs into a bowl, and scoop out the whites with your hand. This way the yolks won’t break.
- Grease free bowl: Any grease or fat can cause your meringue to fail, so clean and wipe down all your equipment before starting.
- No dry Sugar: Swirl the sugar in the simmering water to ensure all of it dissolves.
- Whip until slightly warm: Whip the meringue only until slightly warm. If meringue is cold then you’ve over mixed! Check by pressing your hand against the bowl while mixing.
How to store this Blood Orange Meringue Tart
Unfortunately, once this pie is assembled it must be consumed within 2 days as the meringue deflates very easily.
However, the pie (before being topped with meringue) keeps for at least 2 days. Store in the fridge and covered with cling wrap. Make sure the cling wrap is flush against the filling to prevent a crusty skin from forming.
Ta-Da! The perfect zesty treat to celebrate citrus season! This recipe is so versatile, you can replace the blood oranges with cara cara, lemon, raspberry, etc! You dream it, you make it!
Happy Baking!
Sharon
Blood Orange Meringue Tart
Ingredients
- 1 homemade pâte sucrée pie crust fully baked
for the blood orange curd filling
- ¾ cup (177ml) blood orange juice , approx. 2 oranges
- zest from 2 blood oranges finely grated
- ⅓ cup (40g) granulated sugar
- ¼ cup (30g) cornstarch or ⅛ cup (15g) of arrowroot powder
- 3 tbsp (44ml) water room temperature
- 4 (72g) small egg yolks room temperature
- 1.5 tbsp (20g) unsalted butter cold
- ⅛ tsp (1g) sea salt
for the Italian meringue
- 4 (120g) egg whites room temperature
- 1 cup + 2 tbsp (120g) granulated sugar
- 3 tbsp (42ml) water room temperature
- ¼ tsp (2ml) vanilla extract
Instructions
for the pâte Sucrée
- Fully bake the pâte sucrée according to recipe instructions and let cool at room temperature. While the tart is cooling, make the blood orange curd filling.
for the blood orange curd
- Rub together sugar and orange zest in a sauce pot until combined. Add in blood orange juice and bring to a simmer on low heat.
- Add in cornstarch or arrowroot powder along with 3 tbsp of water. Mix over low heat whisking constantly until a thick slurry forms approx 5-10 minutes.
- In another bowl, whisk the 4 egg yolks until smooth. Temper the eggs, by adding half the simmering thickened blood orange syrup into the egg mixture while whisking to fully combine.
- Return the mixture to the saucepan and continue to cook the curd over low heat for another 5 minutes (never boiling) or until thickened and falls off the whisk in ribbons. Be careful not to cook on high heat or it will curdle.
- Immediately remove the pan from the heat and whisk in butter and salt. Strain the curd through a fine mesh sieve using a spatula the press it through. Discard the orange zest. Optionally (suggested) use a hand-held immersion blender to remove lumps.
- Pour into the slightly cooled tart and lightly tap the pan on the counter to smooth out any air bubbles. Cover with cling wrap, pressing the wrap flush against the filling to prevent a skin from forming. Chill for 4 hours or over night until the filling is set.
for the Italian meringue
- In the bowl of a stand mixer fitting with a whisk attachment or with a hand-held mixture, whisk the egg whites in the bowl of a stand mixer on low speed until frothy and soft peaks form.
- While the egg whites are mixing, combine granulated sugar and water in a saucepan over medium heat and boil until 121°C.
- Gently pour the boiling syrup slowly into the bowl of whisking egg whites - have the machine on slow speed to prevent the boiling sugar from splattering up on you.
- Once all the syrup is added, add vanilla extract and return the machine to high speed and whisk for 2-3 minutes or until the bowl of the mixture is only slightly warm and stiff peaks form. *Check continuously to make sure you don't over beat. Use immediately.
to serve
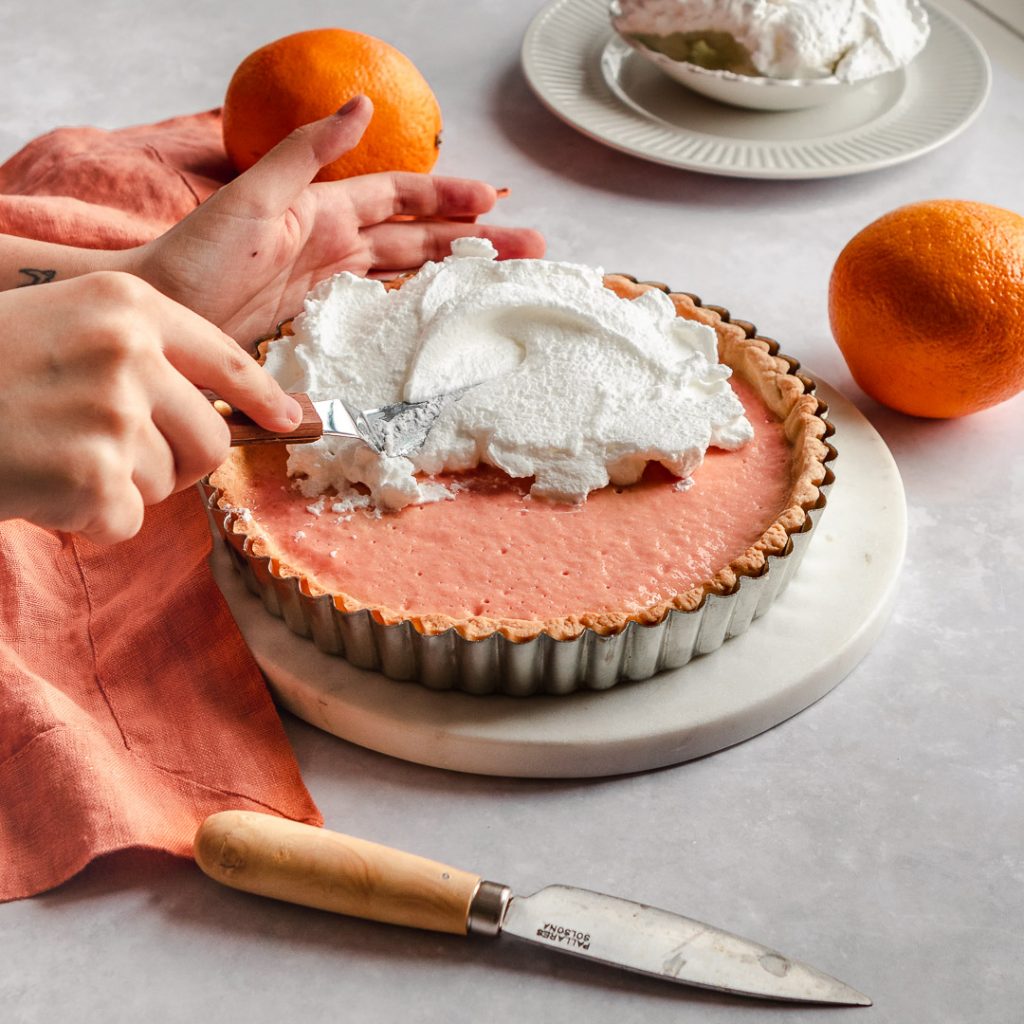
- Spoon Italian meringue onto the surface of the chilled blood orange tart and use an angled spatula to smooth the meringue into desired swirls.
- Using a blow torch on a small flame setting, lightly brush the the tops of the meringue with the flame to brûlée. As always be careful when handling fire. Slice and serve immediately.
Notes
- If you cannot find blood oranges, Cara Cara oranges are the most similar in taste. Taste the curd while making and add more or less sugar according to desired taste.
- Italian meringue is the best suited for this recipe because it is the most stable and is unlikely to weep. Swiss meringue can also be used, but may not be the best for brûlée.
- The crust and curd can be made up to 2 days ahead and the meringue added right before ready to serve. Make the tart and chill covered in the fridge. Make sure the cling wrap is flush against the curd filling so a skin does not form.
- Once fully made, the tart stays fresh no more than 2 days covered in the fridge.


Read the Comments +