


No matter how many times I’ve travelled with my camera, I still get nervous about taking my gear and expensive lenses through the airport and around my destination.
Luckily, practice makes safe, and I’ve packed my camera many times over the years, with no issues. Below are practical tips and a step-by-step guide on How to Pack and Protect Camera Gear for Travel so you can go on your local, national or international trip with confidence that your camera won’t be damaged or lost on route.
*disclaimer* this post contains affiliate links which means that i receive a small commission for purchases made through these links. however, please know that i only provide links to products that have been thoroughly tested, are products I use regularly, and wholeheartedly recommend.

What bag to use to pack your Camera Gear in
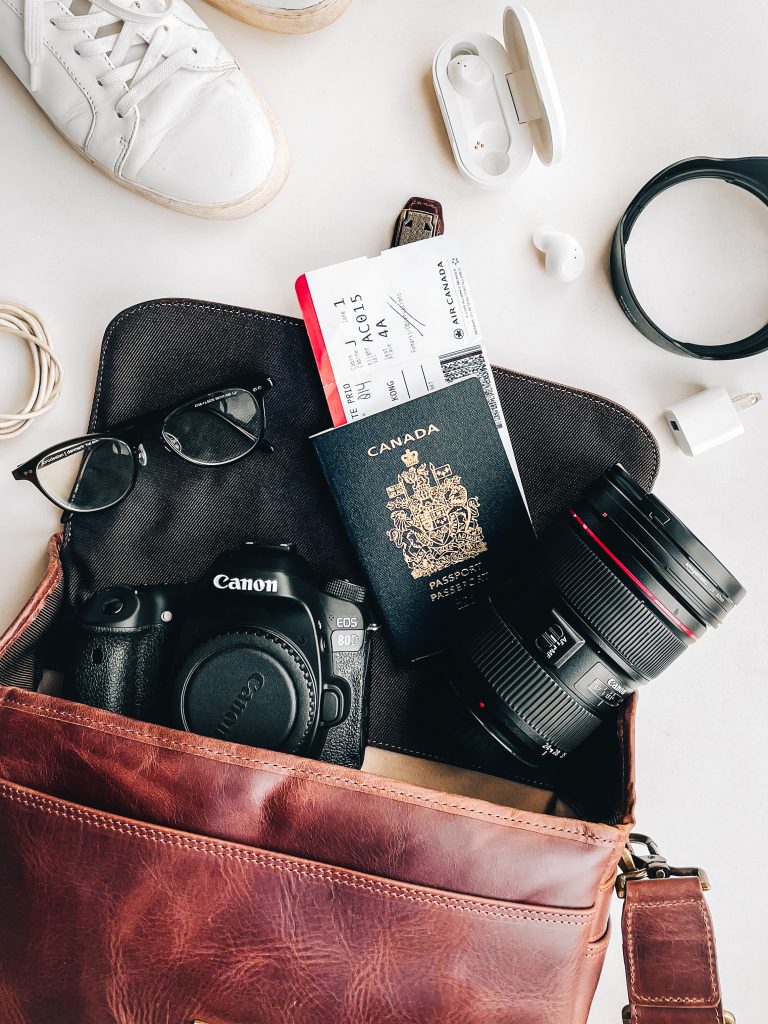
First things first, before you start to pack, you need to decide what gear to bring. Personally, if I’m travelling for leisure, I’ll only bring my Canon 80D and my favorite lens – the Canon 24-70mm. Along with a couple SD cards, battery charger and spares.
Travelling for work is a bit more complicated, and I’ll bring all my lenses (here’s my full gear list, if you’re curious), a tripod, some diffusers and more, but it depends on what the job requires.
What to consider when choosing a travel camera bag
When shopping for a camera bag, I consider the following:
- Size: No matter how chic a bag is, it’s useless if it can’t fit all your gear or is too large to carry.
- Material: When travelling to humid tropical climates, avoid using leather and uncoated fabric bags. There’s nothing worse than getting caught in a thunderstorm with an unprotected camera bag.
- Durability: Padding will be your best friend, so choose a bag with sufficient cushion on the inside.
- Interior organization structure: I prefer bags with detachable dividers, so I can customize how my gear fits in.
- Comfort: Don’t forget that you need to carry the bag! So make sure it’s comfortable enough for you to carry on your back or shoulder.
My go-to camera bag for travel
I have a couple camera bags, but my favorite is the Jumper Camera Backpack by Brevitē. I’m on the petite side (5 ft 1″), so my biggest complaint with camera bags is that they’re often big and masculine looking.
This is not a sponsored review, but I love how minimal the design is, and even when packed to the brim. It doesn’t weigh me down or make me look like a mountain goat carrying a huge pack. My favorite features are: the side entry pocket for easy camera access, the adjustable padded dividers, and the luggage pass through.
Once I’m at my destination, I have a smaller camera bag for daily. My go-to is The Bowery Bag by Ona (also not sponsored), for the real leather, but it’s also low-key and doesn’t scream “I’m a photographer, and I’m carrying expensive gear – rob me” 😆. It fits the essentials, and doubles as a purse, so one less thing to pack!
A Step-by-Step Guide to packing your Camera bag
Now that you have your camera bag, you’re ready to start packing! Here’s a step-by-step guide I follow to pack my camera gear for travel that protects my gear from damage and *bonus* is TSA friendly.
1. Lay out all your gear and take a picture: That way, when you pack for the return trip, you can reference the picture to ensure you don’t leave anything behind.
2. Separate all the camera parts: This may seem strange, but if your camera is jostled with the lens attached it could potentially damage the connection wires and mirror. The camera is better packed on its own. Also, remove the camera battery to prevent leakage and any SD cards.
3. Pack lithium batteries in your check-in: Lithium batteries – these are the round classic batteries in electronics – are prohibited from being carried on the plane; however, they are allowed in check-in luggage. Keep in mind, batteries are sold everywhere so you can always buy them when you arrive.
4. Cap & Secure: Cap your camera body(ies) and all your lenses, then place them into your camera bag. If your bag has the padded adjustable dividers, adjust them so they are tight and snug around your gear.
It’s the little things that make the biggest difference…
5. Wrap and use silica gel packs to wick moisture: This is a little extra, but I’ve found that by wrapping my lens in a dust cloth and throwing in little silica gel packs in the bag helps keep out the moisture when travelling to humid destinations.
6. Heavy Items go at the bottom: If you do need to bring heavier equipment like light stands, flashes, or tripods, pack them in a check-in. Always put those at the bottom, and you can pack your personal clothes on top as extra padding.
7. Pack your accessories: Any electronic accessories like camera battery, chargers, SD cards, or hard drives, store in a separate waterproof case or ziplock bag. Don’t forget to pack your lens wipes and cleaner too!
8. Wrap your cords: It’s a little thing, but makes a world of difference. Did you know there’s a proper way to wrap cords? When wrapped incorrectly you can damage the wire inside, so here’s a little video on how to wrap electronic cables the right way! Once wrapped, I secure it with a re-usable tie that also has a spot for a label.

3 packing Tips for Keeping your Camera gear Safe
If you’ve packed your camera bag well, it’s less likely to be damaged, or worse, stolen. But here are some extra tips to reduce the likelihood of anything bad happening.
- Reduce clutter: Is it really necessary to pack a massive light strobe, filter or diffuser? Probably not. Just bring the essentials, you can always purchase or rent gear at your destination if it’s for a work gig.
- Never check your gear: Loosing luggage is, luckily, less common these days, but it still can happen. Follow the cardinal travel rule and always carry your valuables with you.
- Label Everything – This is key! Label or mark your gear with colored tape so you can distinguish between your gear and others – especially when working on set.
The most important thing when packing your camera for travel is…
Treat it with care. Seems self-explanatory, but the more you clean and care for you gear, the more likely it’ll last the time and the trip! I hope you found this guide helpful as your pack your camera gear for your next trip!
Comment below and let me know what you’ll be doing the next time you pack your camera gear, or share a tip you swear-by below!
Till next time! Sharon
P.S. I’m always opening to hearing what you want me to cover next in regards to photography gear and resources, so leave me a comment below!
Make sure to tag me on Instagram @whiskfullyso and leave a review below if you found this post helpful. I hope you loved it! For more delicious ideas follow me on Pinterest.


Sharon!! This was so helpful and came at the perfect time. I am traveling next week and wasn’t sure if I felt safe bringing my camera. NOW, I totally do!
I’m so happy to hear this Lauren 🙂 I hope your trips goes well, and you’ll have to let me know how the packing and travelling goes!