


Snacktime is anytime when this Sweet & Salty Nut Mix is involved! I’ve been snacking on this recipe since I was in middle school, that’s how much I’m obsessed with this, and sharing this recipe is looooong overdue. This snack comes together so easily and as a middle schooler who didn’t know how to cook anything but frozen pizza, my parents could trust I wouldn’t burn down the house while making this.

What’s in a Sweet & Salty Nut Mix?
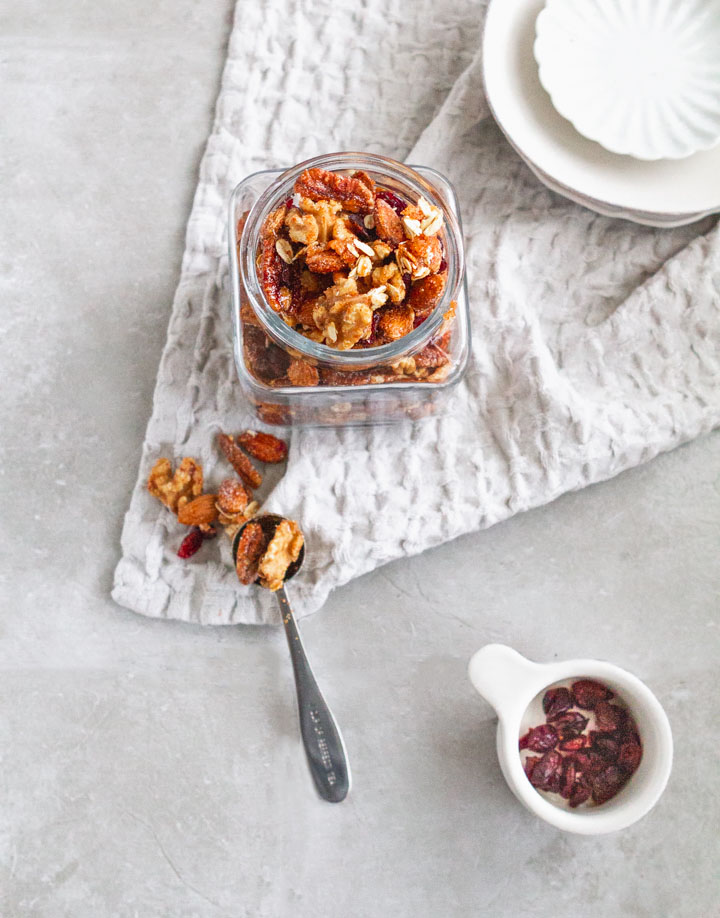
I’ve chosen to use walnuts, almonds and pecans, but you can substitute for your favourites. This nut trio was lightly toasted and then tossed with a sugar, honey coating with a little kick from cayenne pepper. The result? Little clusters of sweet and salty. This nut mix can be made in advanced or when you have a spontaneous craving, so you’ll be reaching for this recipe all the time! As a bonus, you can add a little granola into the mix and sprinkle it over yogurt, oatmeal or even a salad! I love a versatile treat.

The Ingredients You’ll Need…
When I say this recipe is SO easy, I really mean it. No mixing, no chill time, or new ingredients. Here are the deets:
Walnuts, Almonds & Pecans: This trio of nuts is a winner for a reason, the walnuts are earthy, while the almonds and pecans are on the sweeter side. It all balances out.
Cranberries: These are optional, but you’ll thank me for adding a little tartness in every bite.
Granulated Sugar: Just enough to coat every inch of the nuts.
Honey: Because why not? Most importantly, it’ll create those nuts clusters.
Cayenne Pepper: A little of this stuff goes a looong way, so don’t add too much to burn your taste buds.
How to Store this Nut Mix
Store your nut mix in air-tight sealed containers or jars and this nut mix will last 6 months, YES, six months! If you don’t plan on eating it in that time frame, not sure how you could resist though, put the nuts in a ziplock back, push out all the air, and freeze it until ready to serve.
Serve this nut mix…
enjoy as a daily snack,
or over yogurt, oatmeal,
and even as a topping in salad!

Salty & Sweet Nut Mix
Ingredients
- 3 cups walnuts raw
- 3 cups almonds raw
- 2 cups pecans raw
- 1/2 cup dried cranberries
- 1/3 cup granulated sugar
- 1/4 cup honey melted
- 1 tsp cayenne pepper powder add more if desired
- 1 1/2 tsp salt
Instructions
- Preheat the oven to 325°F and line a baking sheet with parchment paper.
- In a bowl, stir with a spoon to combine sugar, cayenne & salt.
- Spaciously arrange the nuts on the prepared baking sheet. Drizzle the melted honey over the nuts and toss until all the nuts are coated in the honey. Sprinkle the sugar/cayenne mixture as well and toss once more.
- Bake the nuts for 10 minutes or until roasted and slightly darker in colour.
- Let the nuts cool for 10 minutes before removing and discarding the parchment paper. Once cooled, add the cranberries and toss to create little clusters. The nuts can be enjoyed immediately; however for the best crunch let the nuts completely cool before eating and storing in an airtight container.
Show me your bakes!
Did you make this recipe?
Tag @WhiskfullySo on Instagram


Read the Comments +