10 Tips for Styling Simple Cakes! The second post in this new “How to Style...” Series in which I share tips and tricks for styling dishes like pasta, stews, cookies, and more so, you can capture beautiful food photography!
I’ve broken down these tips into 3 sections:
- A) General tips for preparing your cake for styling
- B) Tips for ensuring the cake photographs beautifully
- C) Decorative elements to make your cake visually interesting
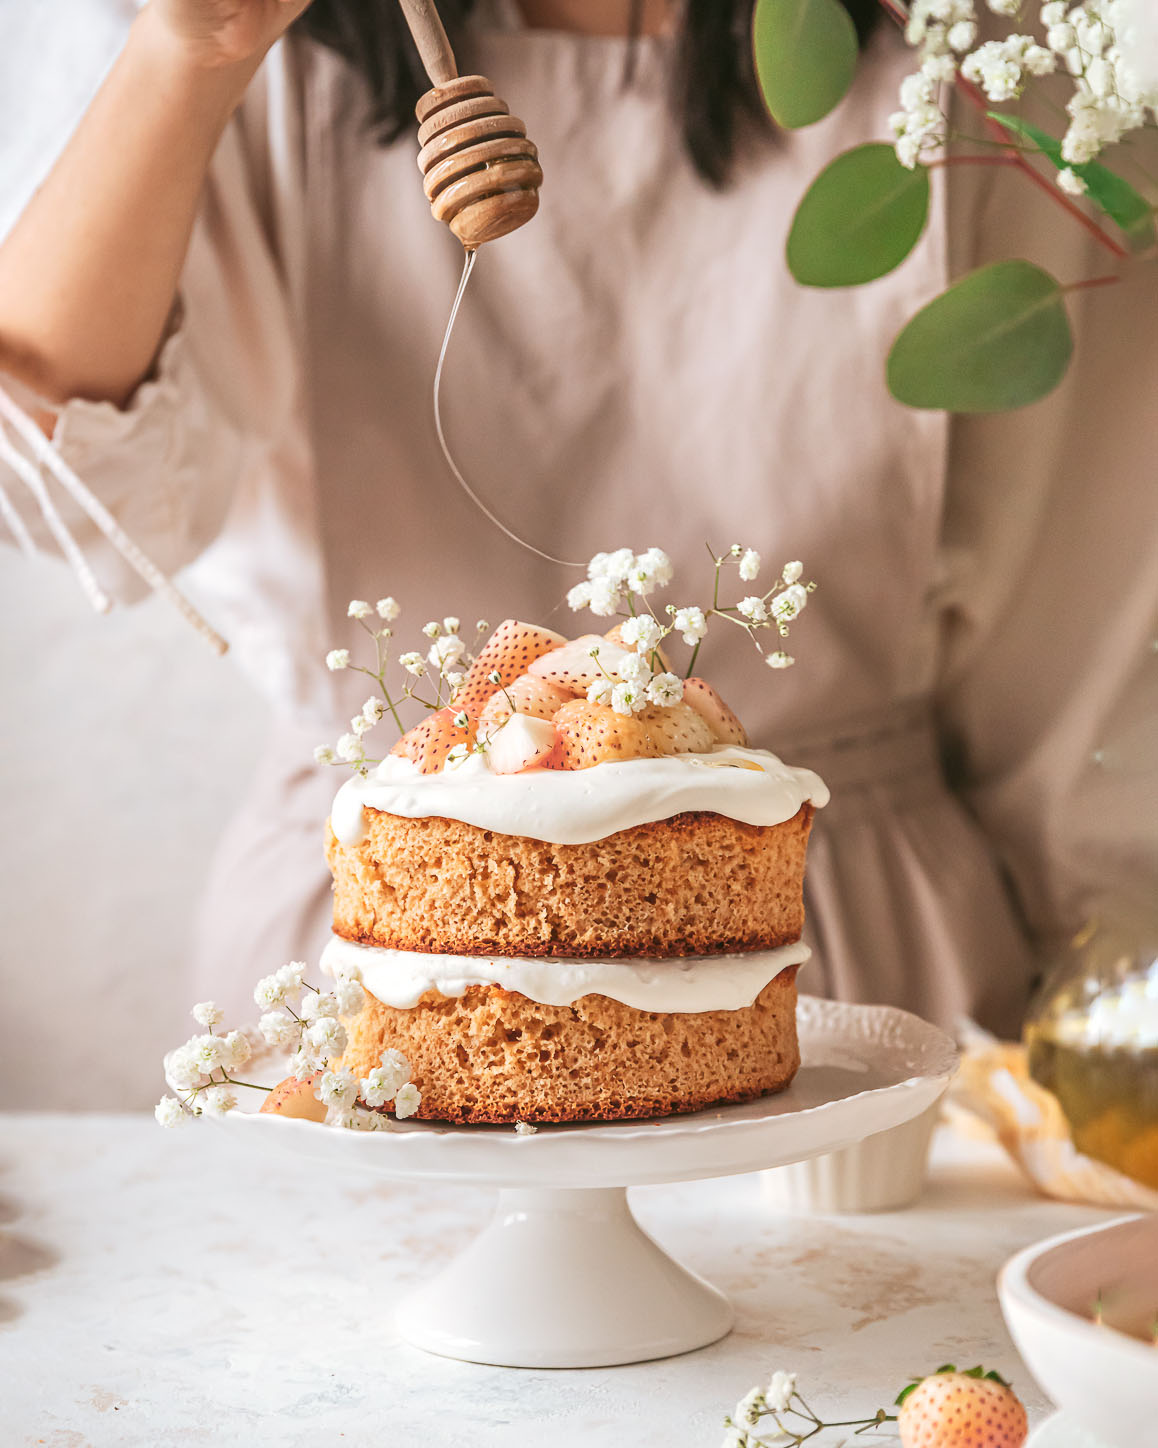
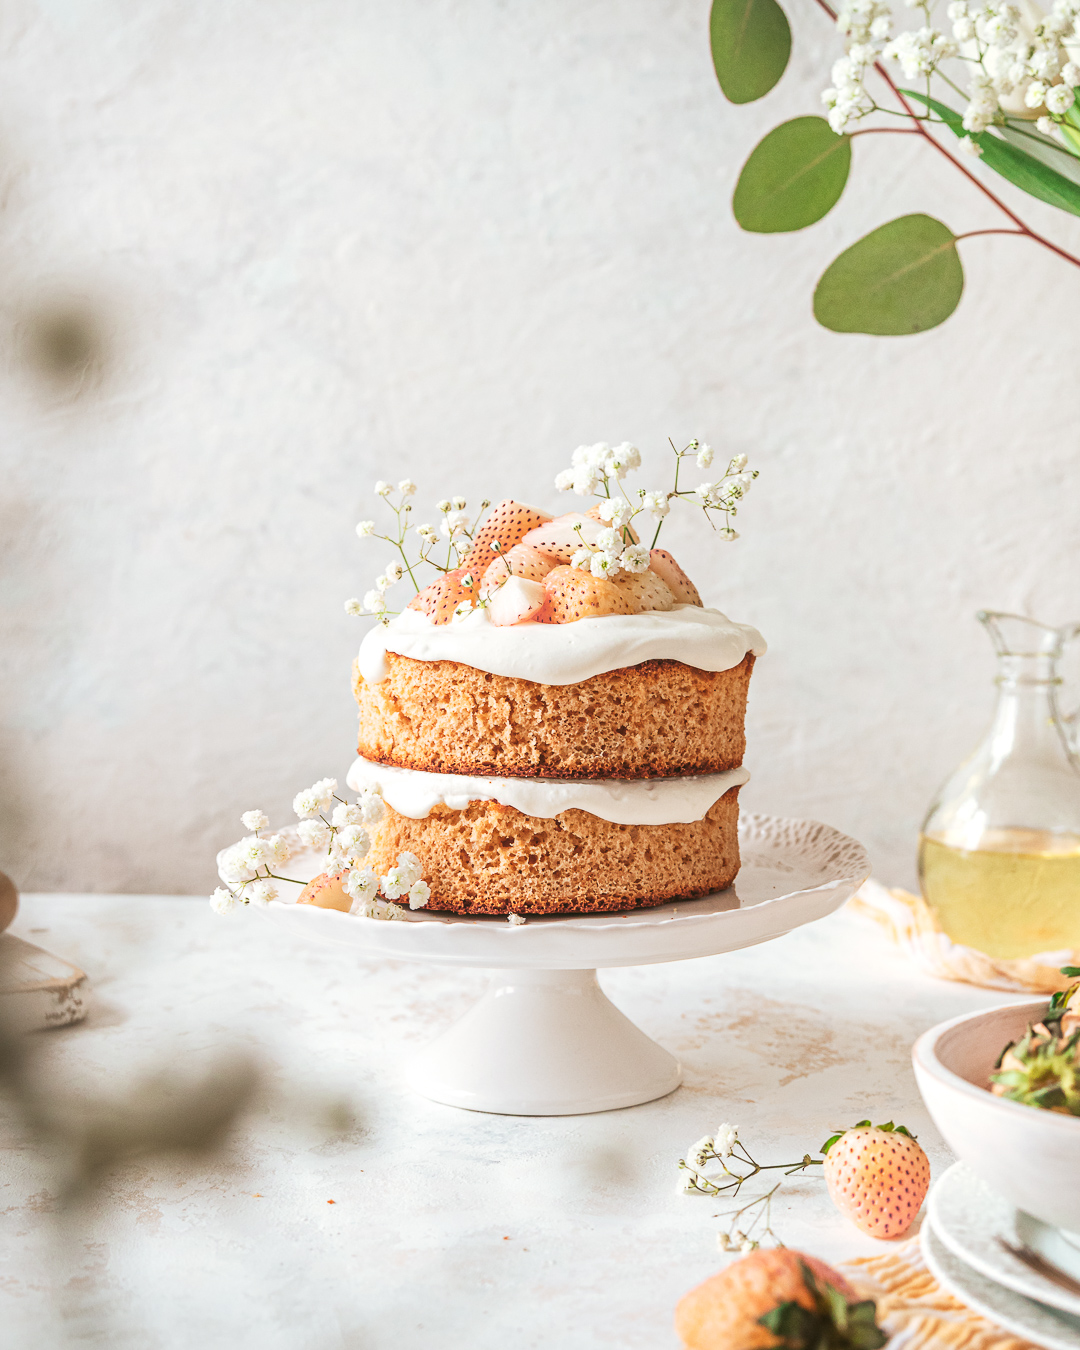
The recipe pictured in these photographs is a Milk & Honey Olive Oil Cake, developed by yours truly! Get the recipe here!
Why do I need to know how to style SIMPLE cakes?
Firstly, when I say simple, I mean any “naked” looking cake that has at least 1 layer. Before we can talk about styling fancy fully-frosted cakes, we need to start with the basics. The truth is…styling simple cakes is HARDER! Say what?! Here’s why:
- Imperfections are magnified – The cake is naked, so any imperfections will be captured by the camera.
- The more simple it is, the more difficult it is to make fancy – Consider a fully-frosted, cake with beautiful painted Swiss meringue buttercream. The cake design itself is so visually appealing, it doesn’t require many props in the background. In contrast, a simple cake needs more help to look beautiful!
Here’s the good news! Simple cakes are super easy to jazz up! The beauty of a simple cake is you don’t need to spend hours frosting and piping; instead, all you need are some key guidelines to ensure that any decoration you do add instantly ups the beauty factor!
I don’t use anything fancy, but there are some tools I recommend. You can check them out here!
Tips for Camera-ready Simple cakes
Watch the video below to see a little behind the scenes of how I styled this Milk & Honey Olive Oil Cake!
A) General tips to prep your cake for styling
Tip #1 – Trim and level off
Even before you begin styling, this is the foundation for a beautiful cake. The first thing I do, is get out my ruler and my best serrated knife, and I trim off any burnt edges, and level off the tops so I’m decorating a flat surface. Especially crucial if you have more than one layer!
tip #2 – Coat with a simple syrup
A simple syrup is a combination of sugar and water. This is used in bakeries and homemade cakes to keep a cake moist during the lengthy decoration stages. For food photography purposes, this makes the cake look extra moist and fresh – even if you baked it the day before! Before you begin decorating, brush the tops and sides of the cake with syrup until it is no longer is dry to the touch. While shooting, touch up with syrup if the cake starts looking dry. Don’t over soak it though or it will loose structure!
SIMPLE SYRUP RECIPE
- 1/2 cup granulated sugar
- 1/2 cup water
Dissolve the sugar in water in a small saucepan over medium heat. Let cool, then pour into a glass jar and seal tightly. Keeps for one month when refrigerated.
tip #3 – Let it fully cool
This may seem obvious, but I’ve made this mistake plenty of times myself due to impatience. Always let the cake fully cool before decorating or your decorations will melt right off! Cakes are also easier to slice when cooled! Use a serrated knife so you get perfectly razor-sharp cuts!
B) Tips for ensuring your cake photographs beautifully
Practical reminders for when you’re styling your cake scene.
tip #4 – Elevate with props
This is one of the benefits of styling a simple cake. Since the cake is simple, you can use more decorative props. I’ve chosen a cake stand with a beautiful scalloped ruffled edge. I wouldn’t have chosen this for a fancier cake as it would have been distracting, but for this cake it’s perfect!
tip #5 – Show the Hero Side
Whether a part of the cake caved in while baking, or an edge tore off while being de-panned, there are sometimes mistakes that need covering. The easiest fix is to cover it with some frosting, but if all else fails, always point the best side of the cake to the camera! Notice how I hid the side with a torn edge by facing it towards my body?
This also applies to any garnishes you add! Focus your decorating attention on the sides of the cake you’re showing or where the camera will be pointing.
tip #6 – Add height
The easiest way to make a simple cake stand out from all the other props is to make it the tallest (if not, second tallest), and largest element. Remember, the larger an element is in a composition the more your viewer’s eye will be drawn to it! I explain this more in my post about Using Design Principles in Food Photography for Better Composition!
You can add height simply by adding 1 or more layers, or stacking frosting or fruit!
C) Decorative elements to make your cake visually interesting
tip #7 – Frost it up
This option is best if your recipe calls for frosting, or if you have multiple imperfections that need covering! Depending on the cake recipe, I’ll either use buttercream frosting or whipped cream. When styling simple cakes, I’ll use whatever matches the mood of the cake. I chose whipped cream since the cake is very light. Whatever the frosting flavor, apply the frosting using an angled spatula to give it lots of height and swirls for visual interest and texture.
tip #8 – When in doubt, always add fruit
If frosting isn’t enough, the next element I’ll add is fresh fruit! Use berries, figs, delicate currents, or even apples. I’ll add a season relevant fruit to level it up! Adding fresh produce instantly gives your cake life and contrasts against the texture of the cake!
TIP TO REMEMBER:
- Only use fresh fruit!
- Make sure the color of the fruit doesn’t clash with the color of the cake.
EX. For this cake I chose white Strawberries with a slight pink. This makes them special but not too vibrant to go against the dreamy mood of the image.
tip #9 – Flowers for whimsy
Flowers are an instant winner! For this cake I chose to use baby’s breath for its delicate shape and “halo-like” effect around the cake. Consider the “visual” weight of the flowers you choose. Large big bloom flowers wouldn’t be as successful in this image because it would cover the strawberries and make the cake look top-heavy. Remember! Use season appropriate florals! It wouldn’t make sense to use tulips for a winter cake. Instead use pine cones, tree boughs or holly.
tip #10 – Drizzle it up!
Lastly, to really make people drool, I always add a sauce or a dusting of powdered sugar. Consider this to be the finishing garnish. The best styled cakes make people drool with well placed drips of caramel, honey or dustings of powdered sugar.
Just by using 1 of these tips, I promise styling simple cakes just got a hell of a lot stronger! As always, if you have any questions, comment below!
I’m always opening to hearing what you want me to cover next in this series!
Till next time! Sharon
Make sure to tag me on Instagram @whiskfullyso and leave a review below if you found this post helpful. I hope you loved it! For more delicious ideas follow me on Pinterest.



Great tips! These suggestions for cake styling are so helpful. I especially liked the advice on using fresh flowers and simple garnishes. Thanks for sharing!
Sweet E’s Bake Shop
(https://www.sweetesbakeshop.com/)
These tips are perfect and so incredibly helpful. I especially loved the tip about soaking the cake in a simple syrup before shooting. I never would have thought about that. Your advice on colour, height and texture are spot on and really help you understand why these elements are so important in photography. Thank you so much for this.
Yes! The simple syrup really makes a huge difference, taste-wise and when shooting! So happy to hear that you found this post helpful!