


Chapter 3 of my Styling Series! This post is all about creating Better Food Photography with the Principles of Design!
If you’re new to this series, you can catchup on the first post here which is all about my top 10 Essential Food Photography Props, and the second post here which covers My Process for Selecting Props!
What are the Principles of Design?
If you’re a graphic designer, photographer, or if you’ve ever taken an art class, then you’ll be familiar with these terms. The 8 principles of designs are fundamental rules an artist must follow to create effective and attractive composition.
The 8 fundamental rules are:
1. Alignment
2. Balance
3. Contrast
4. Emphasis
5. Movement
6. Proportion
7. Repetition
8. Negative Space
I remember learning about these rules in high school art class. Fast forward 10 years and now I’m using them everyday in my food photography work!
But WAIT! Isn’t design about creativity? Who said anything about rules?
If you’re just starting out in food photography you may be creating by following your gut or by what inspires you. However, using all the props you want and combining it with whatever colors, will unlikely create something visually stunning. This is where the design principles come in. By applying these rules (one or more) to your styling and compositions, you’ll create work that has balance, is visually strong and is compositionally “stable”. It is these rules that are at the foundation of every beautiful photo and understanding these principles will allow you to then create freely.
Breaking down the Principles of Design
#1. Alignment
Alignment refers to how each element in a work is placed in relation to each other. Think about how text blocks are aligned in a newspaper or magazine. If the text boxes were all over the place, it would be impossible to read! Your eyes would be jumping everywhere!
To apply this in food photography, consider the placement of your props or subject(s). Each placement should be intentional. YOU, tell the viewer how their eyes should move around the image.
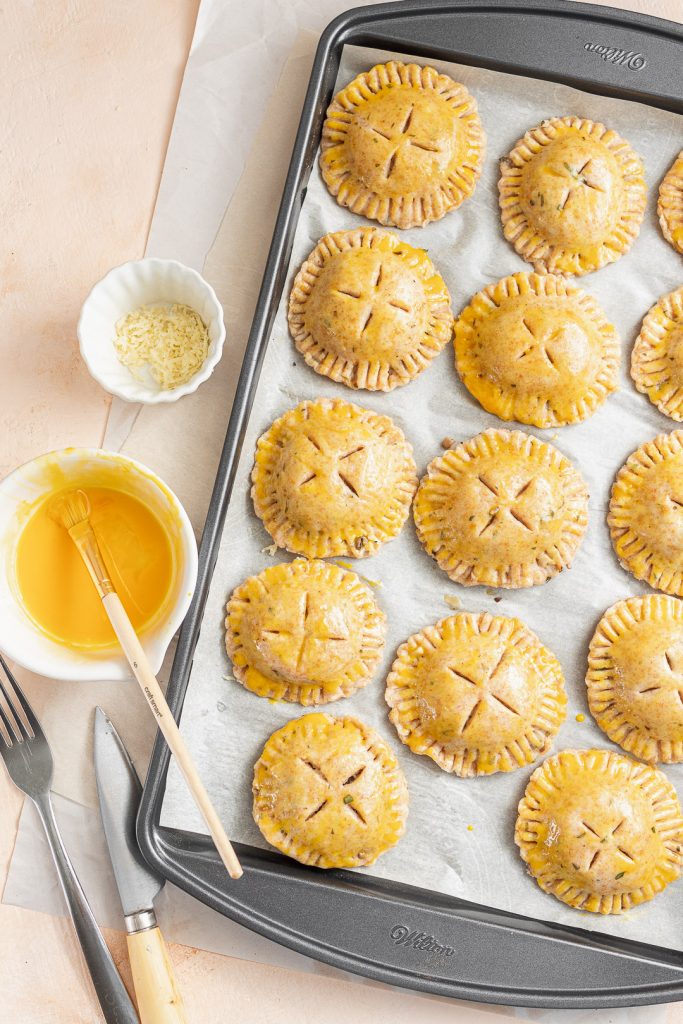
HOW IT WORKS – Look at the hand pies above. I chose to place them in 3 vertical columns to contrast the looser placement of the props on the left. While the columns are not perfectly straight, there’s enough alignment so that the viewer’s eyes will move up and down the photo. If I had placed the pies in a un-organized fashion, the photo would become messy and distracting.
#2. Balance
Balance is achieved when elements of varying weight are placed in a harmonious manner. Each prop has a weight. The weight can come from texture, color, size, and how you arrange each prop determines how balanced your image will be. The 2 main types of visual balance are: 1) Symmetrical and 2) Asymmetrical.
1.Symmetrical balance…
Is created when elements are equally weighted and mirror each other in placement. This is most commonly used in city/ landscape photography. The trap with symmetrical balance is it can get predictable.
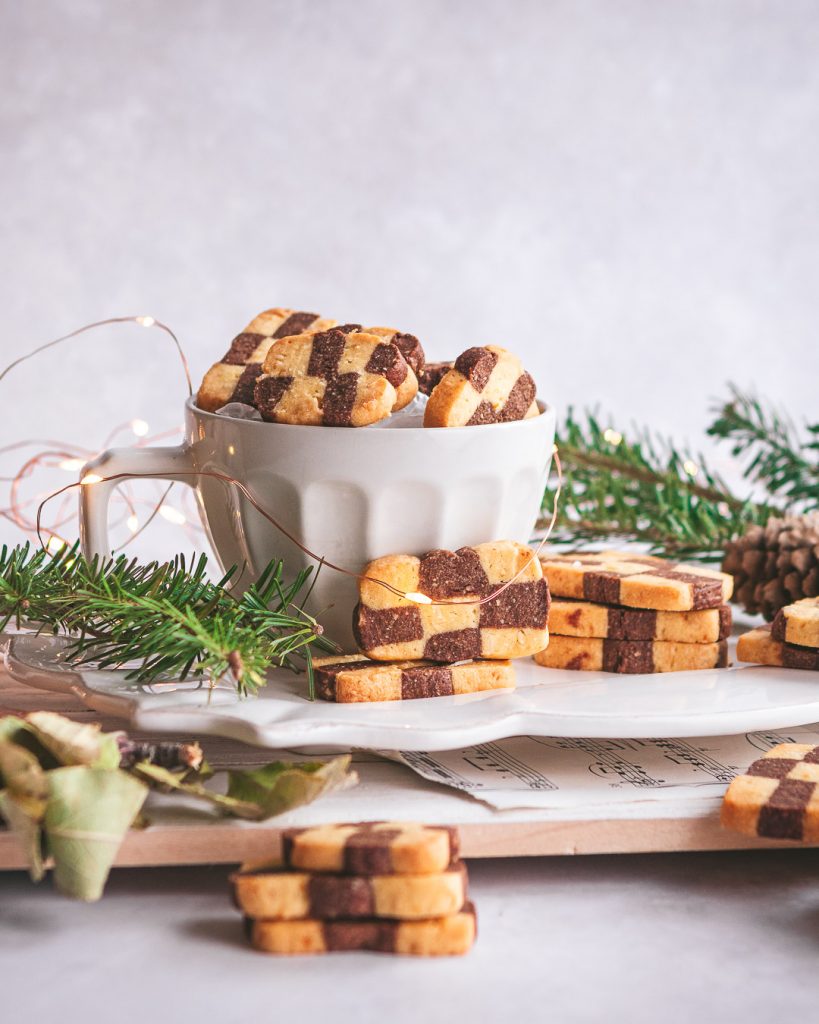
HOW IT WORKS – In the image above left, Christams tress branches are placed on both sides of the cup. If you were to draw line through the center of the photo and compare both sides, you’d find that the sides mirror each other.
2. Asymmetrical Balance…
Is created when elements are contrasted in weight. This creates a bolder image.
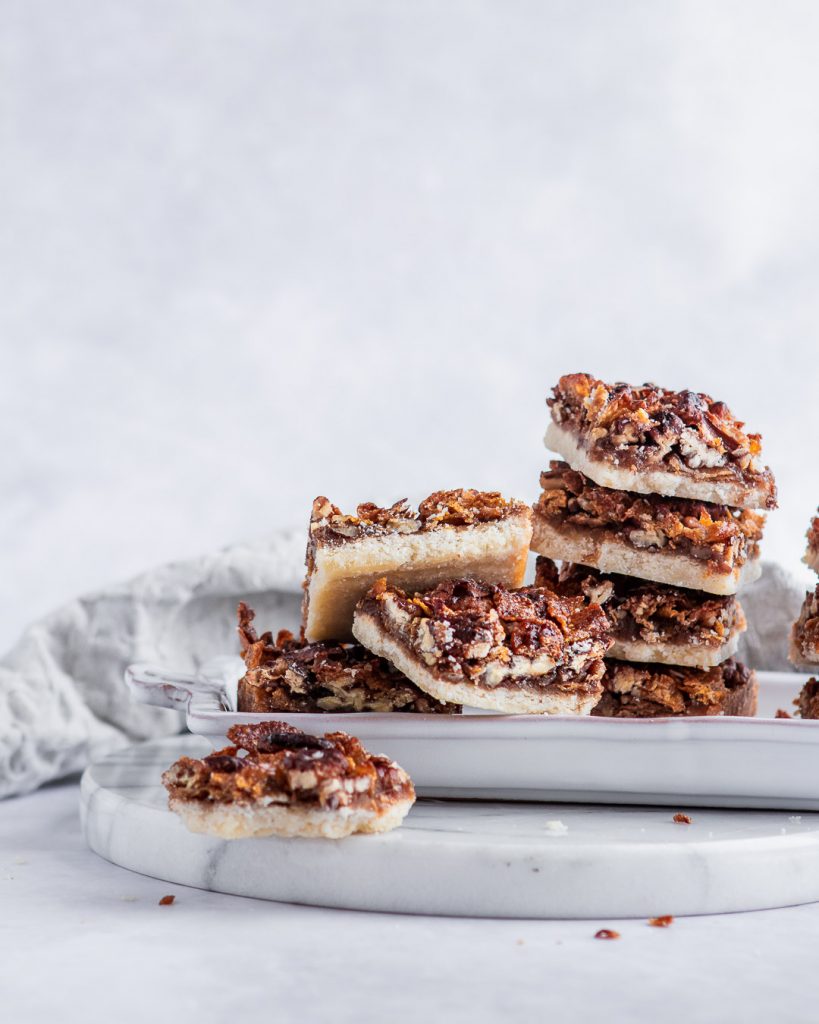
HOW THIS WORKS – In the cornflake bars (above right) one stack is taller than the other. This creates visual levels and it also helps the viewer distinguish the bars individually, rather than a chunk of bars.
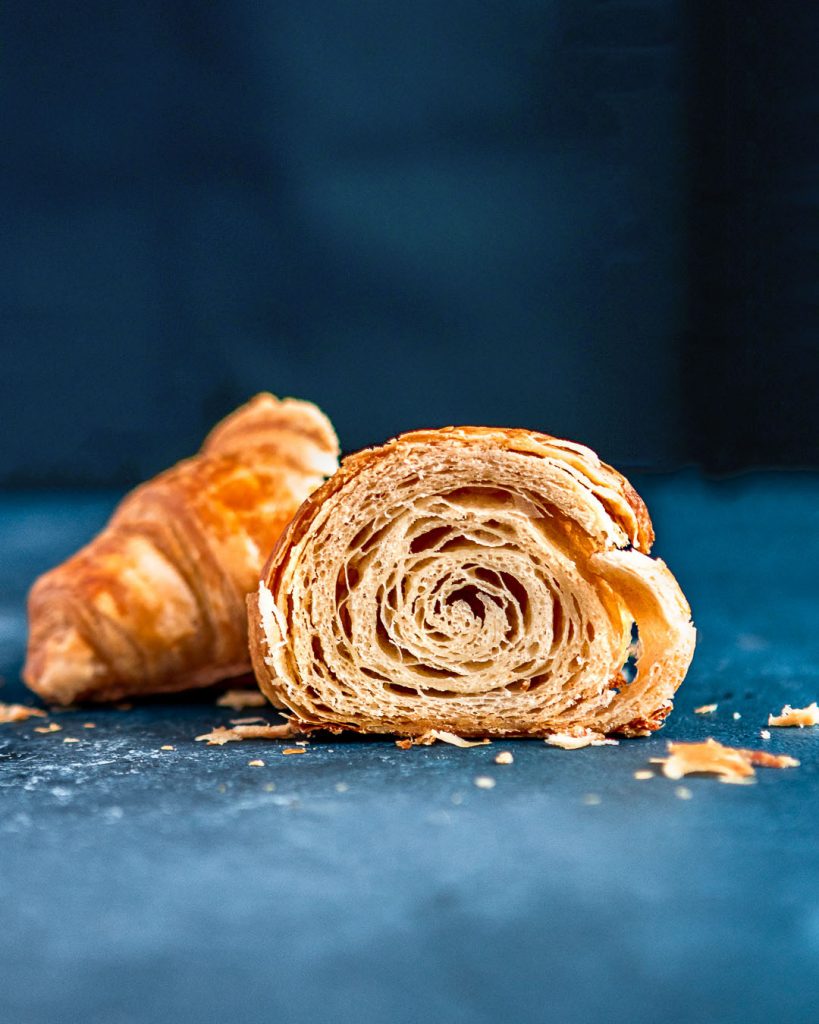
#3. Contrast
You know when you look at an image that just “pops”? That’s contrast. Contrast is when the subject of a photo jumps out from all the other props and background. In food photography, adjustments in light and aperture can also create contrast, but in this post we’re focusing on composition and styling.
HOW IT WORKS – Using complimentary colors, the croissant (yellow) and backdrop (blue), creates a balanced contrast that makes the croissant pop.
#4. Emphasis
Emphasis is a strategy that aims to draw the viewer’s attention to a specific design element , or prop, in the case of food photography. This is so important in food photography, where there can be several elements in a photograph. A successful photo clearly tells the viewer which element is the subject.
This can be done in several ways:
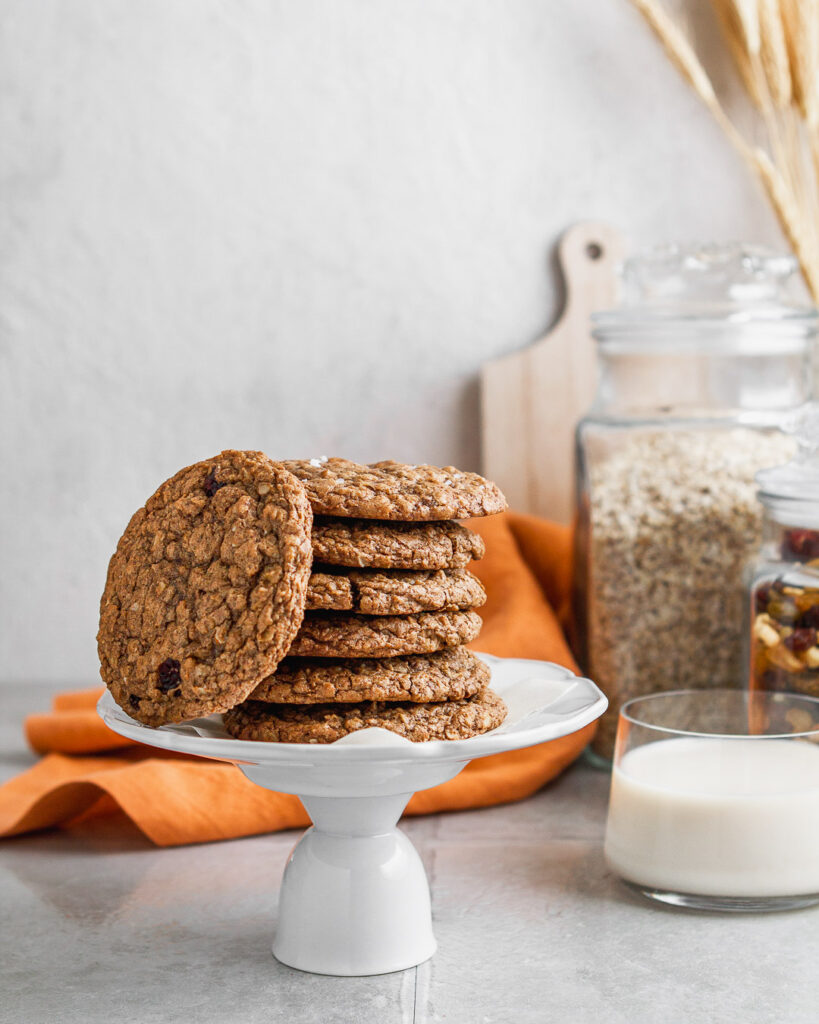
1. Make the focal point the largest.
HOW IT WORKS – When styling the Oatmeal Raisin Cookies above, I stacked the cookies to make it the largest item in the photo. Then by placing it in the foreground, it is the first thing the viewer sees, thereby increasing its importance.
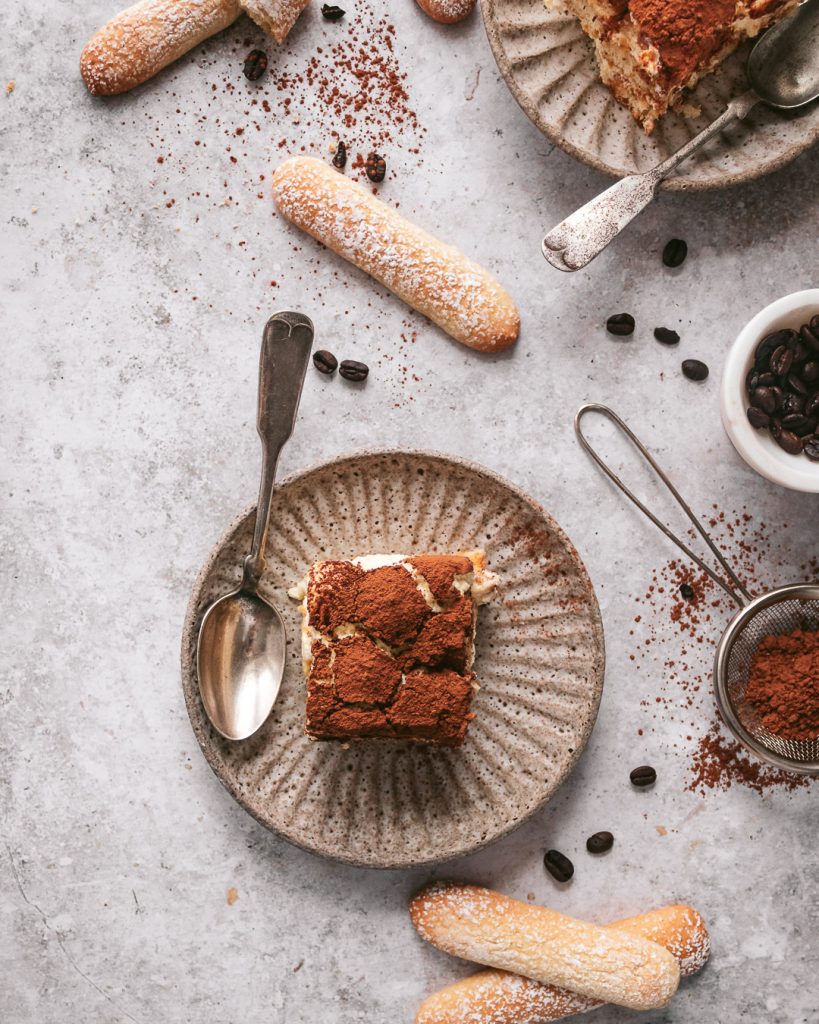
2. Draw attention to it with leading lines.
HOW IT WORKS – In this Tiramisu photo, the bottom slice is the main subject. I communicate this by placing all the lady finger cookies so they are pointing to that plate.
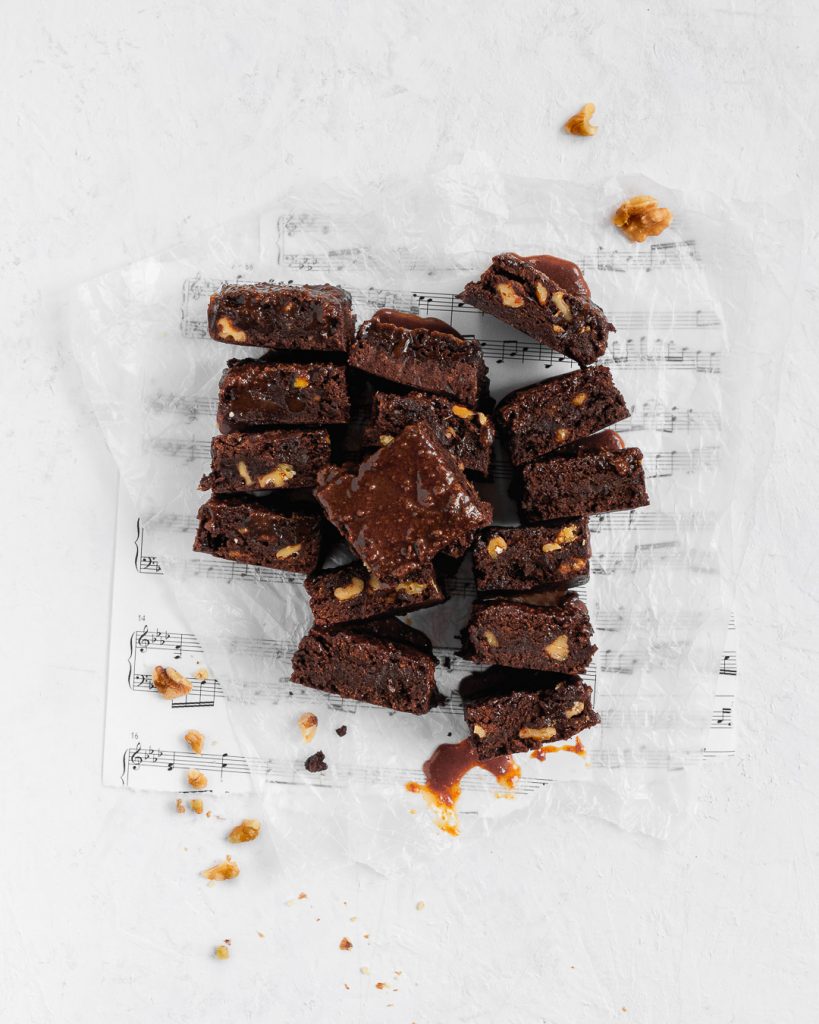
3. A break in pattern
HOW IT WORKS – By breaking up the pattern of brownies, the top brownie stands out from all the others.
#5. Movement
My favourite design principle (and the one I use most often 🙂 ). Movement is creating a “path” to guide the viewer’s eye through different elements in a creative work. This is one of the most effective principles in food photography! Just by adding a little movement it brings your dish to life and makes your viewer feel like they are “there”.
There are two types of movement:
Literal – actual physical movement. (Ie. pour shots, cheese pulls etc.)
Compositional – movement of the viewer’s eye through the composition to areas of emphasis.
Movement can be show in the following ways:
1. Lines
2. Edges – Compositing props in S-curve or C-curves.
3. Shapes
4. Color
5. Human element
6. Captured movement: sugar dusting, poured liquids, splashes, splatters.
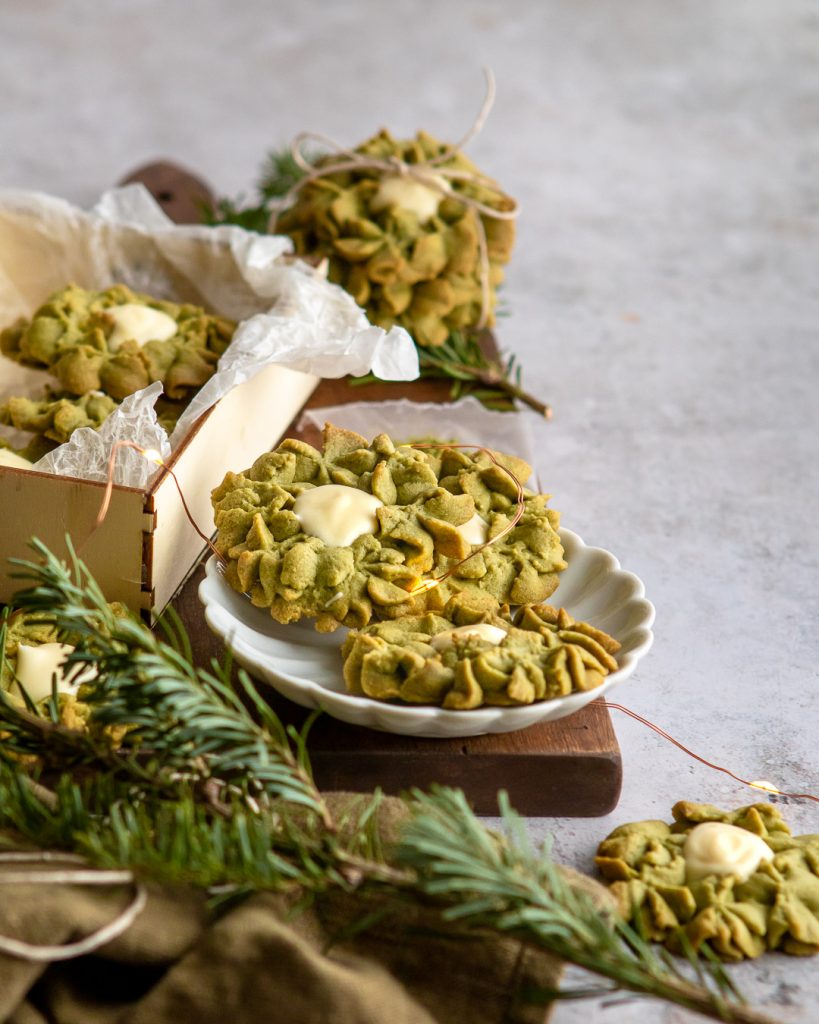
HOW IT WORKS – I placed these Matcha White Chocolate cookies in a c-curve along the frame of the photo. By using compositional movement, the viewer’s eye is brought to the subject: the plate with 3 cookies. The line of lights also creates curves to guide the eye.
#6. Proportion
Proportion is the visual size and weight of elements in a composition and how they relate to each other. Grouping related items can give them importance. In food photography, consider the size of all your props. I like to have my subject be the largest, so it doesn’t get swamped by other items.
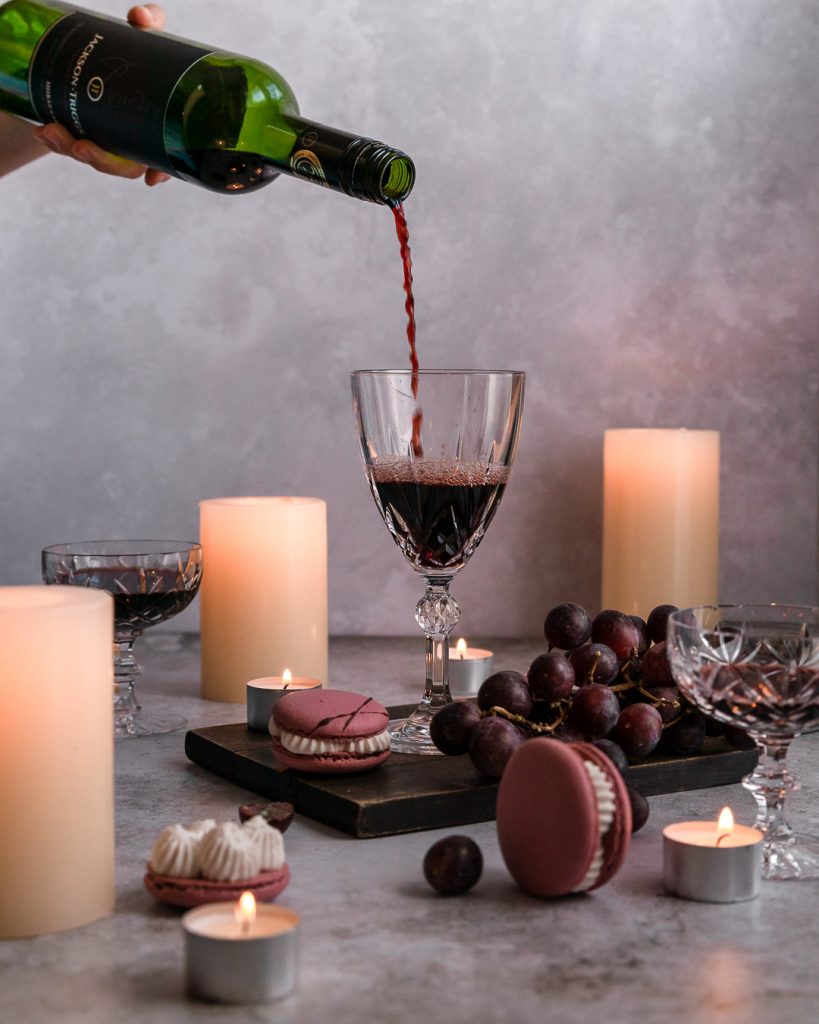
HOW IT WORKS – Notice how in this Red Wine Macarons photo I used candles of varying size? This prevents them from taking over the attention. If they were the same height it would make the photo distracting (since “like” objects draw attention). Also note how the main wine glass is the largest! This emphasizes its importance.
#7. Repetition
Repetition is repeating a SINGLE element many times in a design to bring unity, cohesiveness and consistency. This makes a photograph seem active and creates visual excitement.
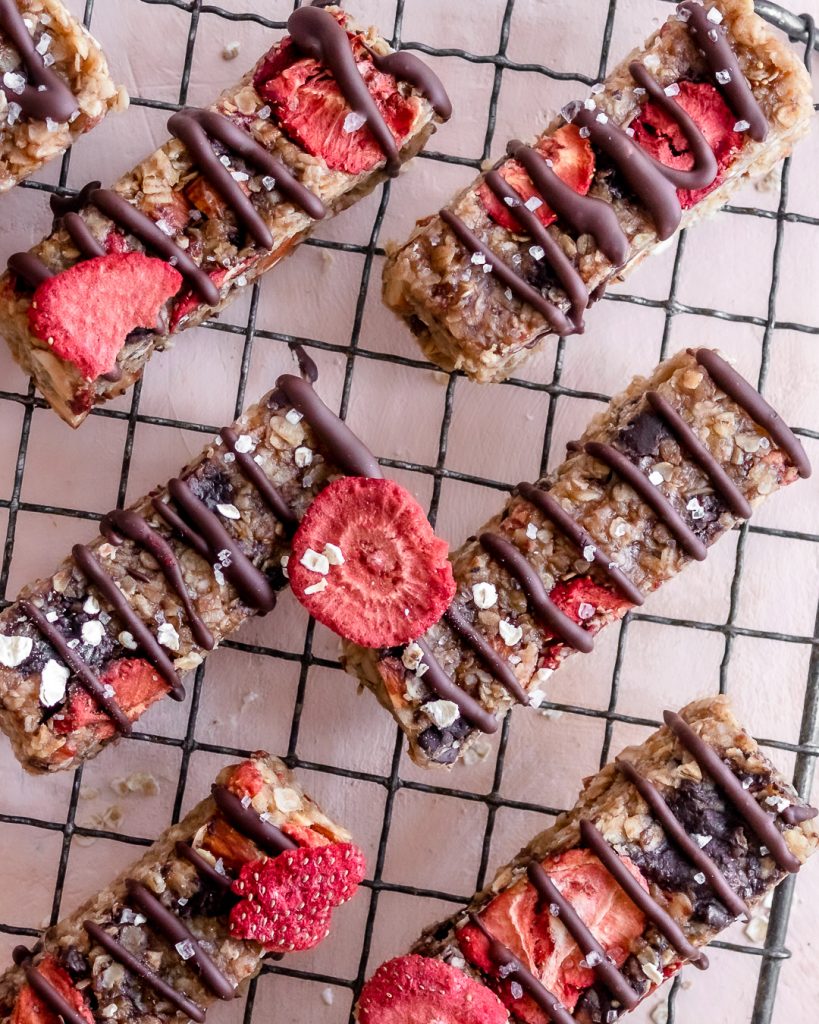
HOW IT WORKS – This principle is very common in food photography, because it works! Why have one granola bar, when you can have 8! The more the merrier! Instantly these granola bars seem exciting!
#8. Negative Space
Negative Space is the space between, within and surrounding an object in an image. It’s important to have negative space in food photography so a photo is balanced rather than busy. Negative space also helps identify the main focal point. Be intentional with your negative space placement, as the placement of the space also signifies its importance.
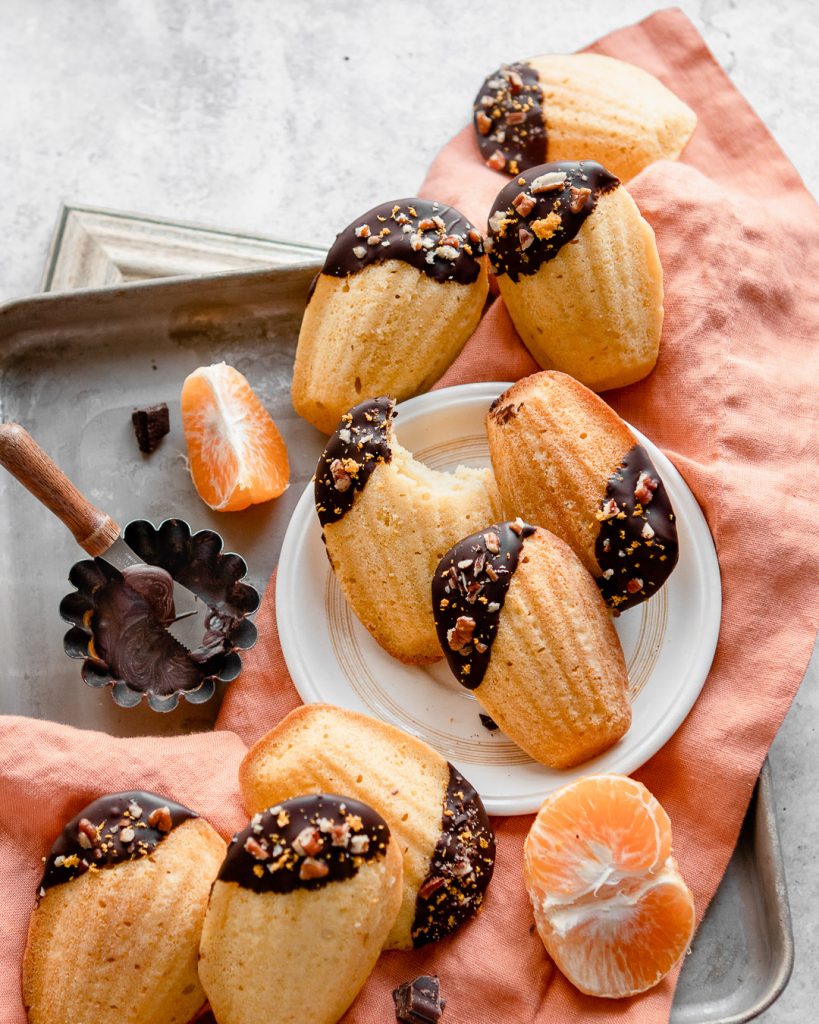
HOW IT WORKS – The Honey Orange Madeleines take up the majority of the space in this composition. To prevent the image from getting too busy, negative space in the upper left corner gives viewer a visual “breath of air”.
Putting it all to practice!
Now that you know all 8 of the Design Principles, let’s put it into practice! If the idea of these principles is daunting, try implementing 1 at a time. Here’s an example on how you can use more than 1 in an image.
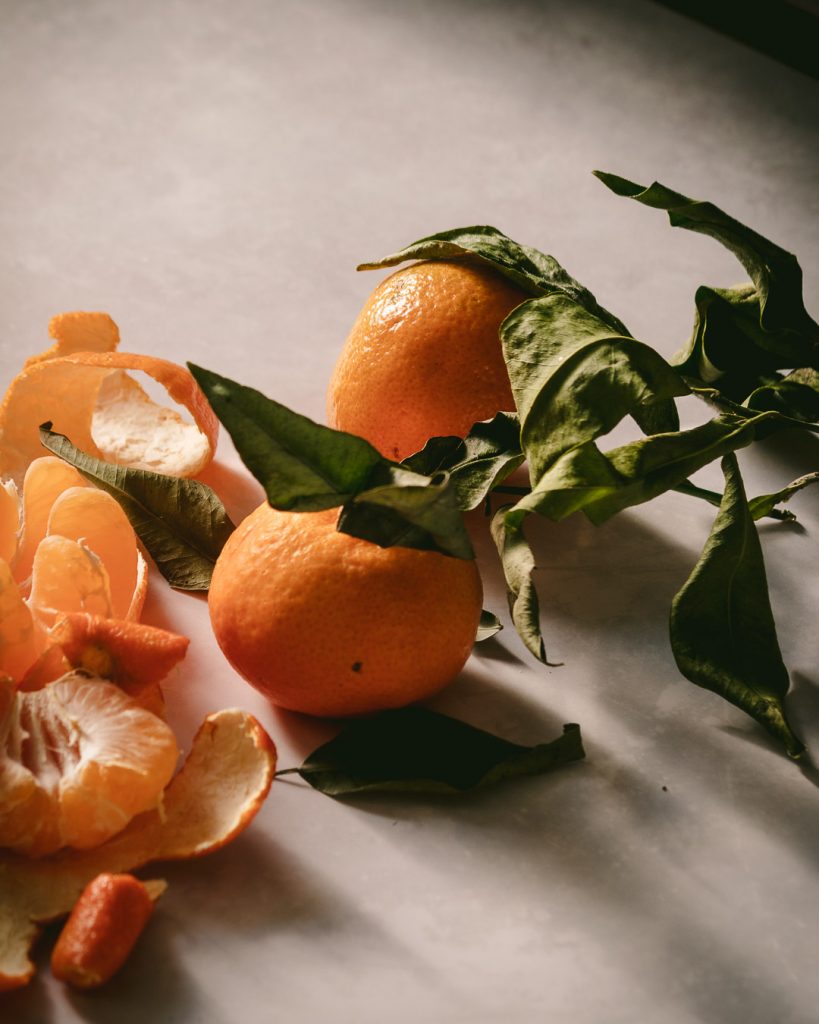
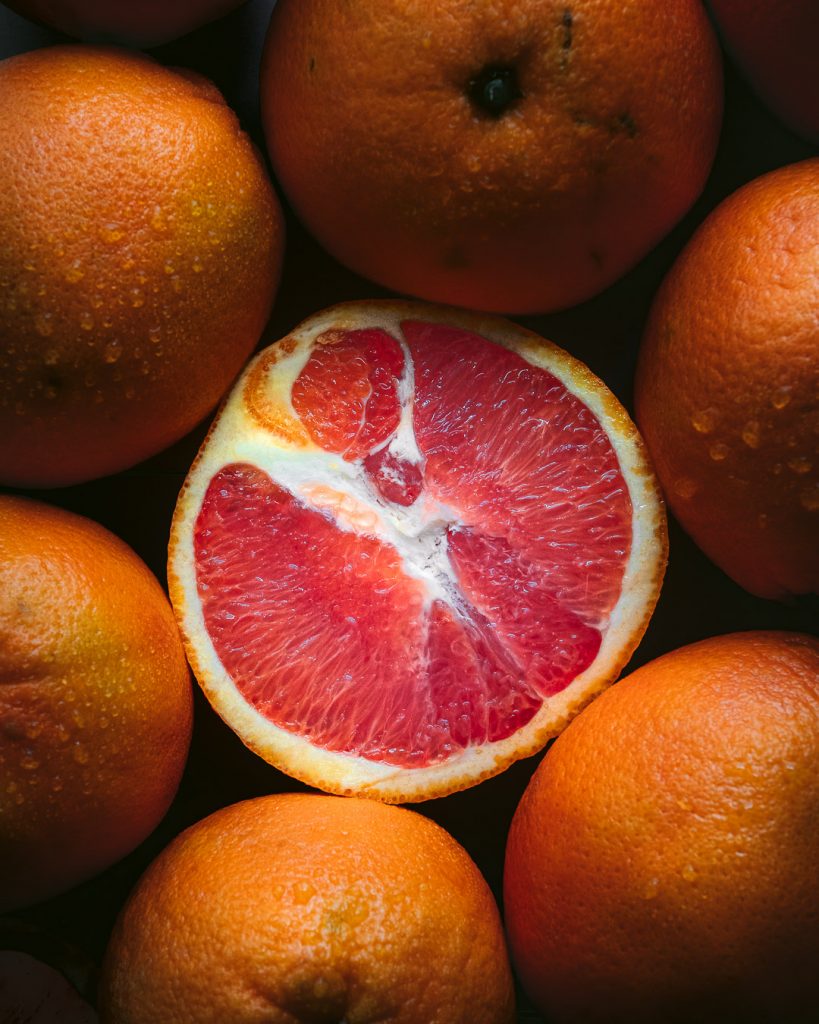
HOW IT WORKS – For this Blood Orange photo, I used Repetition and Contrast as my main principles.
Repetition is used not only in the reoccurring oranges, but also the circle pattern. The oranges are circles, and also the oranges are formed in a ring.
Contrast is displayed not only in color: Red/orange with black, but also in editing the shadows and whites. The deep shadows make the oranges pop even more.
Additional Design Principles Used:
Negative Space – The space between each orange gives breath to the photo.
Emphasis – The center orange is highlighted as the subject by showing it sliced open.
I hope you learned something new in this post all about design principles! Food Photography composition can be intimidating, but by implementing even 1 design principle you’ll find that your photos improve!
Till next time! Sharon
Make sure to tag me on Instagram @whiskfullyso and leave a review below if you found this post helpful. I hope you loved it! For more delicious ideas follow me on Pinterest.


Read the Comments +