


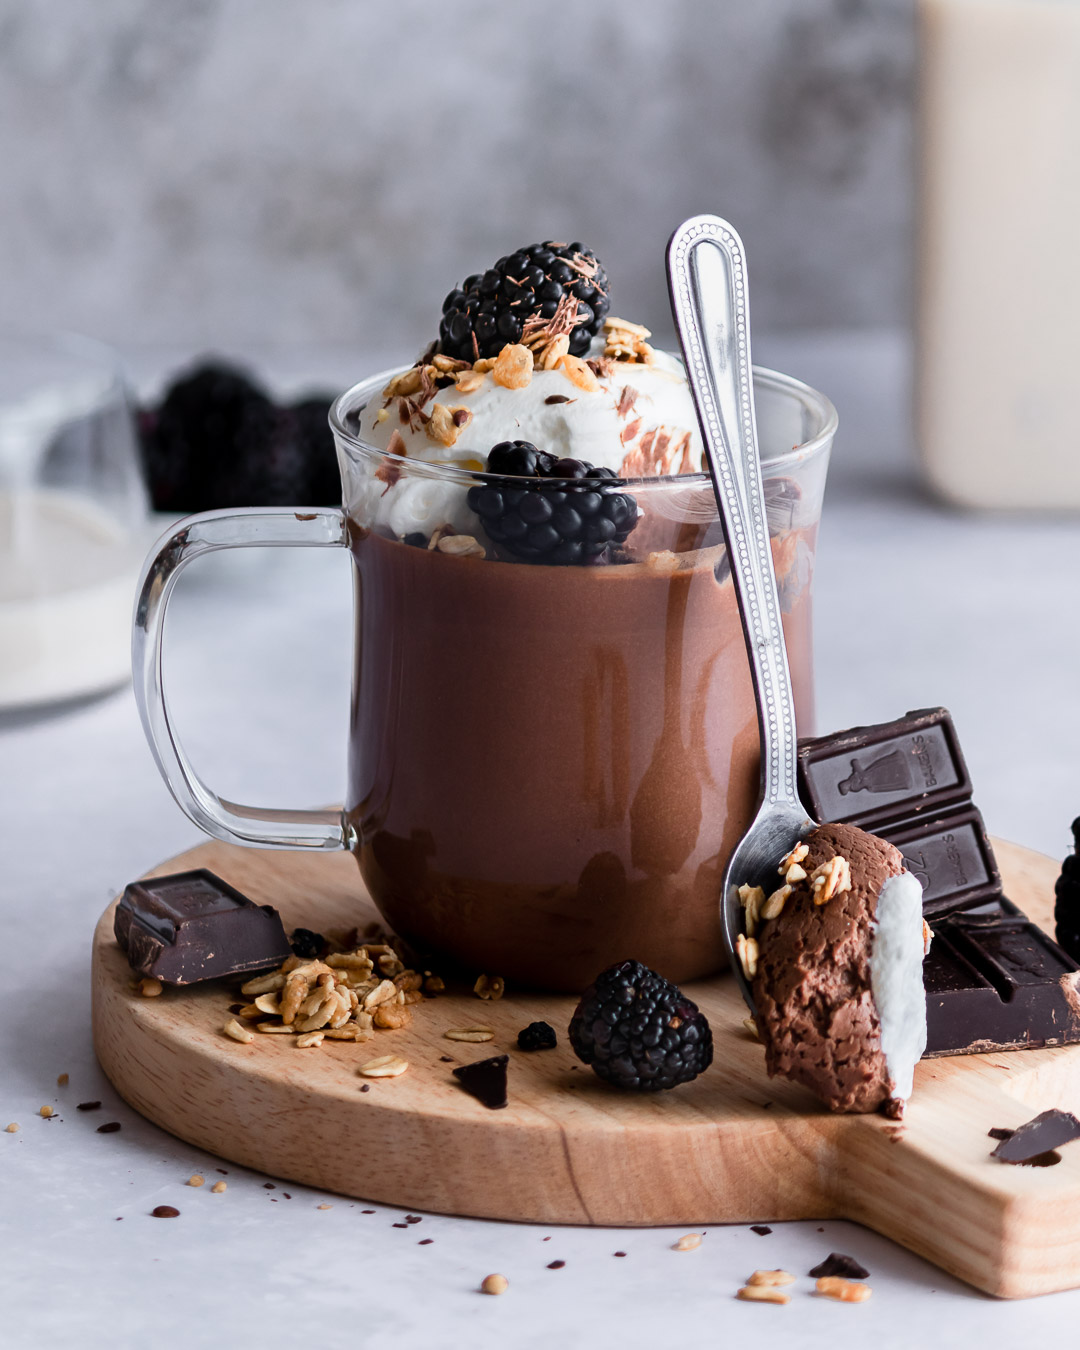


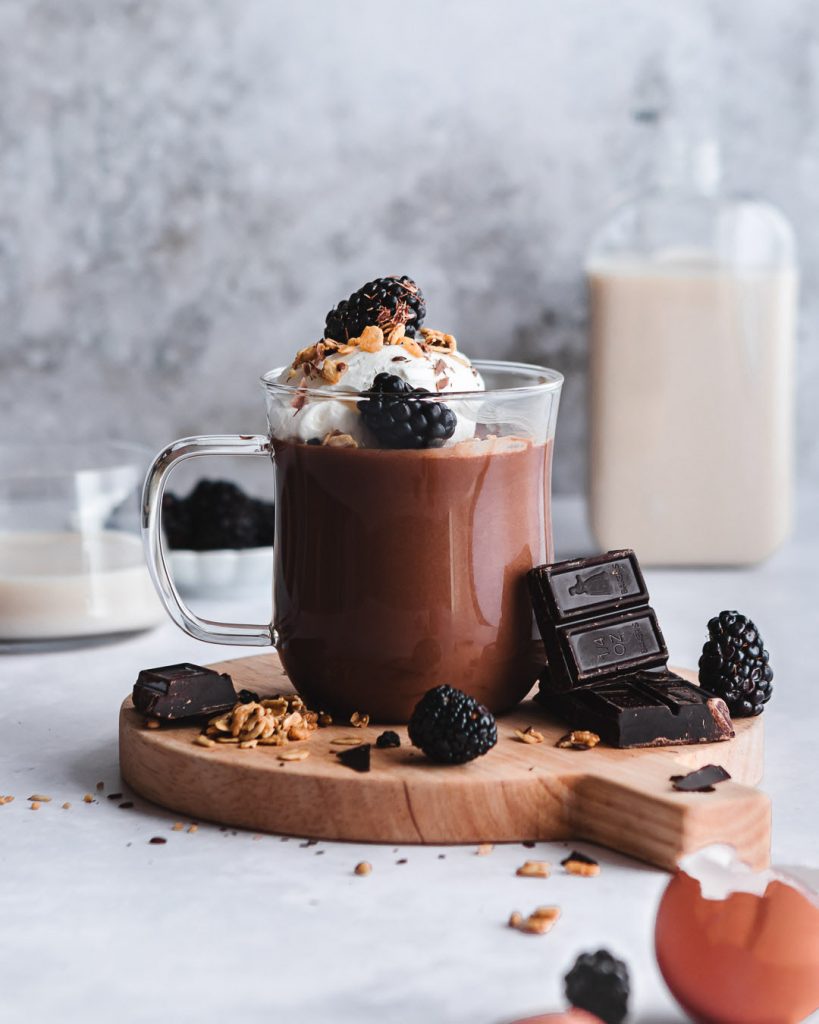
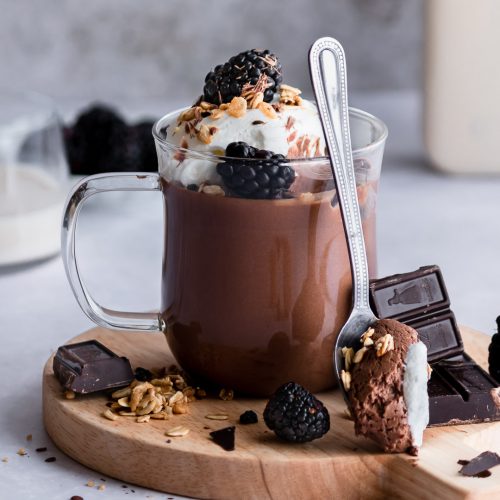
A 30 minute Chocolate Mousse that is rich and decadent, but OH SO EASY! Unlike other recipes, that required 2+ hours of setting time, this mousse thickens in just 30 minutes! Serve them in mason jars, champagne flutes or bowls and top with fruits, whipped cream/greek yogurt , nuts and more for a delicious treat!
Why is Chocolate Mousse so good?
Chocolate mousse is delicious for 2 simple reasons: 1) It’s chocolate on steroids; 2) It’s the perfect bite of creamy, fresh and bitter-sweet.
YIELD: This recipe makes enough chocolate mousse for two (2).
METHOD: This recipe uses a method used to make anglaise cream: a sweetened vanilla sauce. This method is perfect for mousse because it ensures the eggs are fully cooked and smooth.
TEXTURE: Chocolate mousse is smooth, decadent and creamy.
FLAVOR: Chocolate, chocolate, chocolate! I highly HIGHLY suggest splurging and using high quality chocolate. You will definitely taste the difference.
LEVEL OF DIFFICULTY: EASY – This recipe is super SUPER easy! No fancy equipment and skills required.
Ingredients you’ll need for Chocolate Mousse
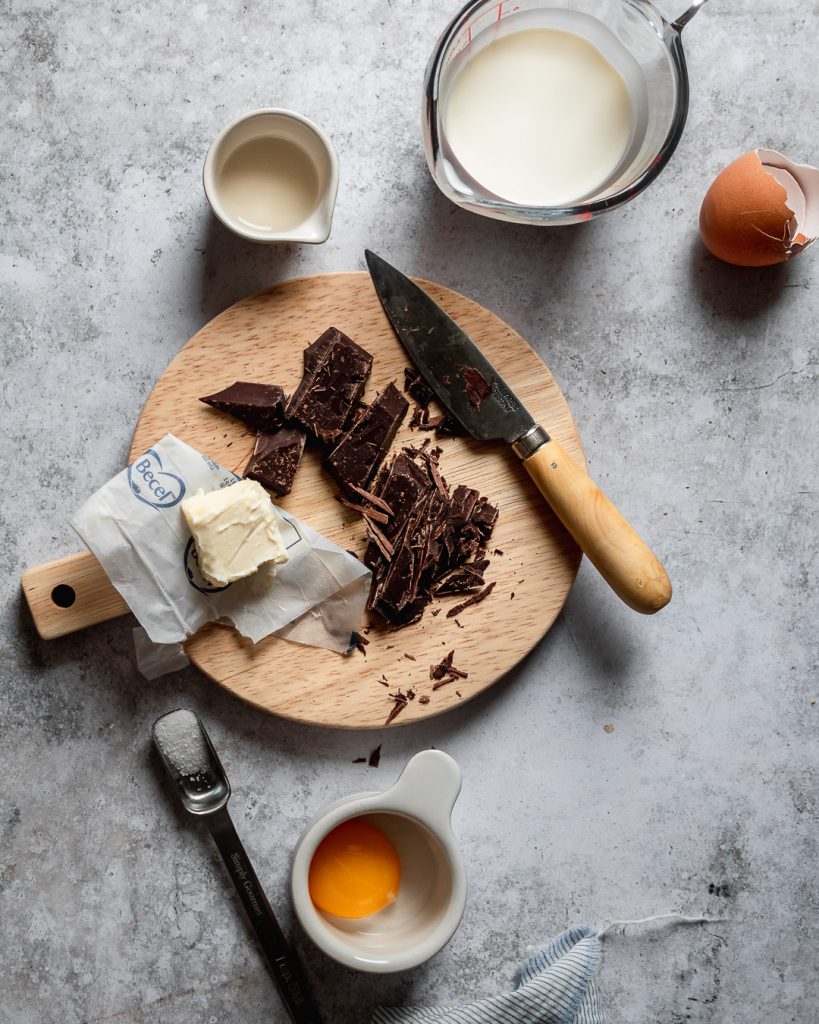
Whipping Cream – Make sure you get heavy whipping cream with at least 35% milk fat! Anything else will not thicken up.
Milk – You can use whole milk or plant-based! Both work!
Granulated Sugar – This recipes uses only a teaspoon to give sweetness to the bitter chocolate.
Egg yolk – This really gives a creamy rich texture to the mousse. For a vegan option, sub the egg yolk with 1/4 cup coconut cream.
65%+ Bitter-sweet Chocolate – This is personal preference, but I recommend bittersweet chocolate to get a richer taste. If you prefer something sweeter you can always sub half for milk chocolate.
Step-by-step instructions to make Chocolate Mousse
No fancy equipment or skills required, so let’s get cooking!
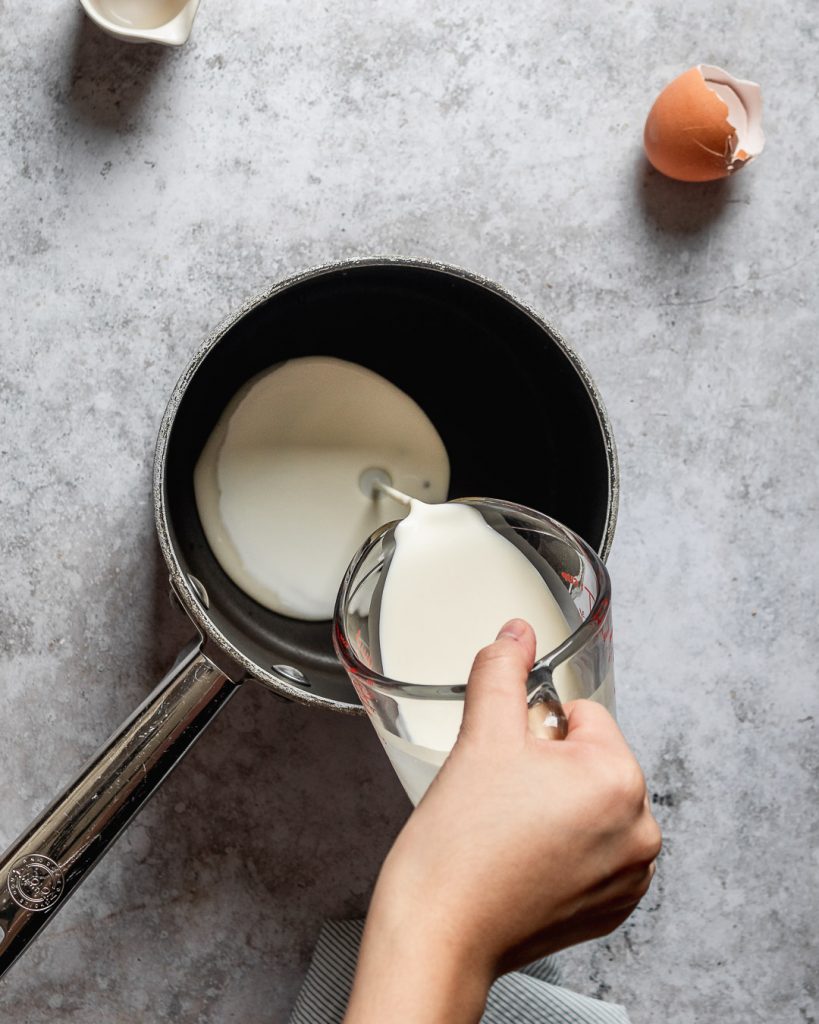
#1. Bring the heavy cream & milk to a simmer
Similar to making chocolate ganache or glaze, the warm milk will melt the chocolate. This way, the chocolate does not need to come into contact with direct heat with fire. Set aside half of the heavy cream for later and Make sure the milk does exceed a simmer or it will be too hot.
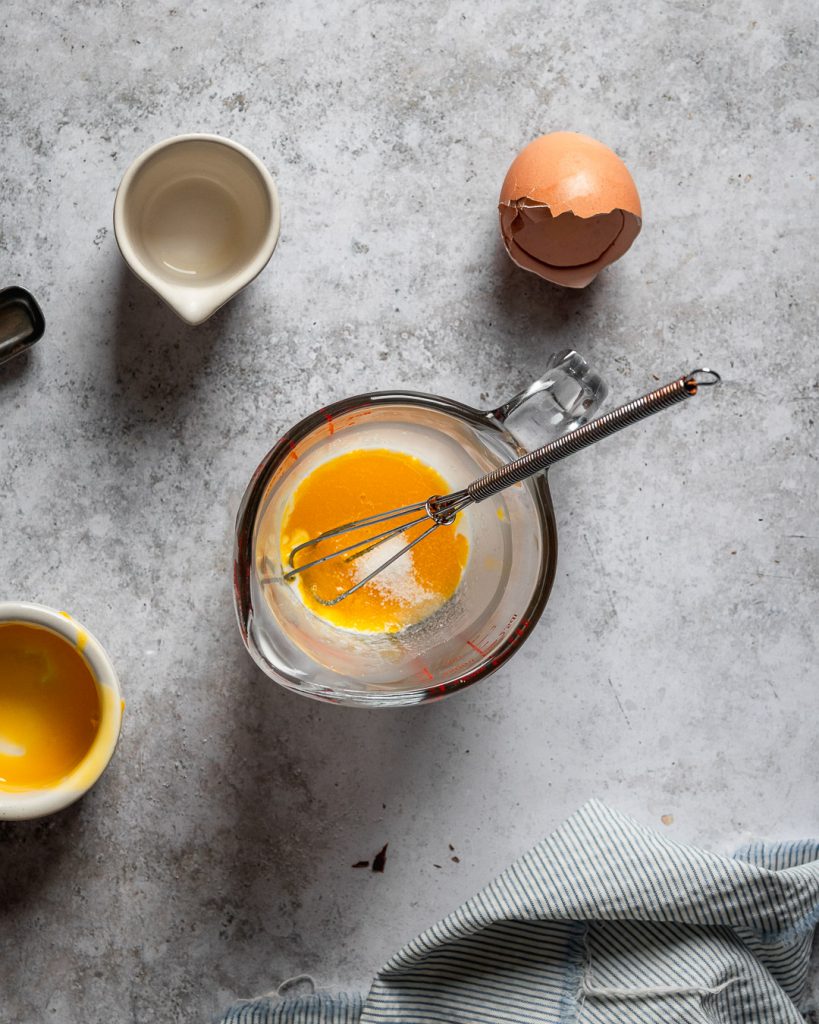
#2. Whisk the eggs &sugar together
In a small bowl or pitcher, whisk together the egg yolk (or coconut cream for vegan option) and sugar until foamy.
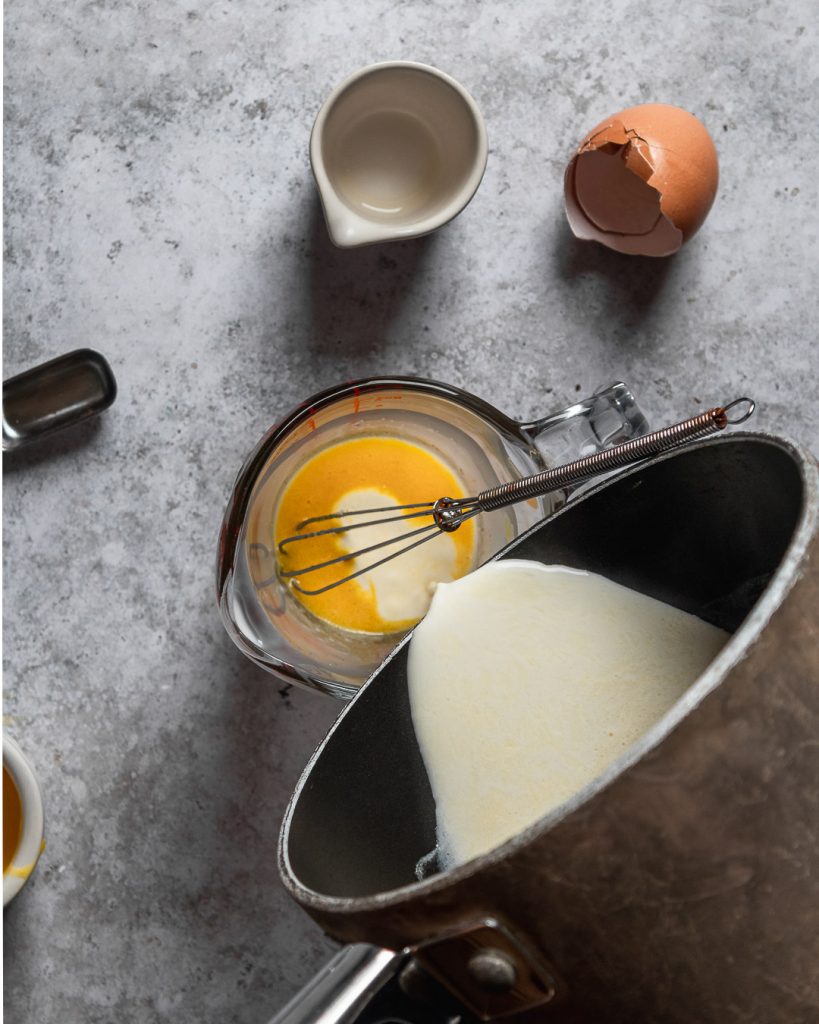
#3. Temper eggs with warm milk
Tempering is a step I use A LOT in my recipes, and it’s nothing fancy. I don’t want to add all the warm milk in one go to the eggs because they are different temperatures. The “cold” egg yolk will curdle when blasted with hot milk. So stream in a little at a time while whisking to prevent curdling.
TIP: If you do overheat your milk, let it cool to a touch-able temperature before using.
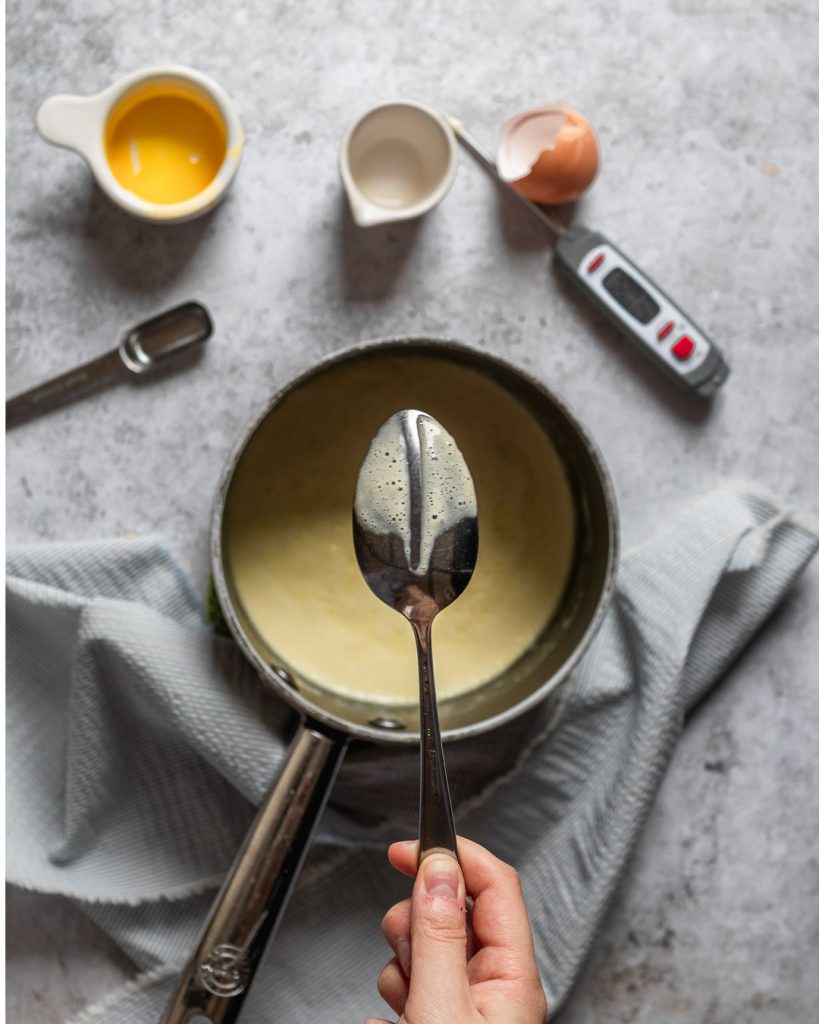
#4. Pour back into the pot & whisk until thickened
Now that both the mixtures are at the same temperature, pour it back into the pot and cook over low heat whisking occasionally until it reaches 180-183°F/ 82 -85°C and is thickened. You’ve made anglaise cream!! This stuff is also AMAZING over pie or brownies.
TIP: Check by coating the back of a spoon, and running a finger through the mixture. It should hold its structure when you swipe your fingertip across it.
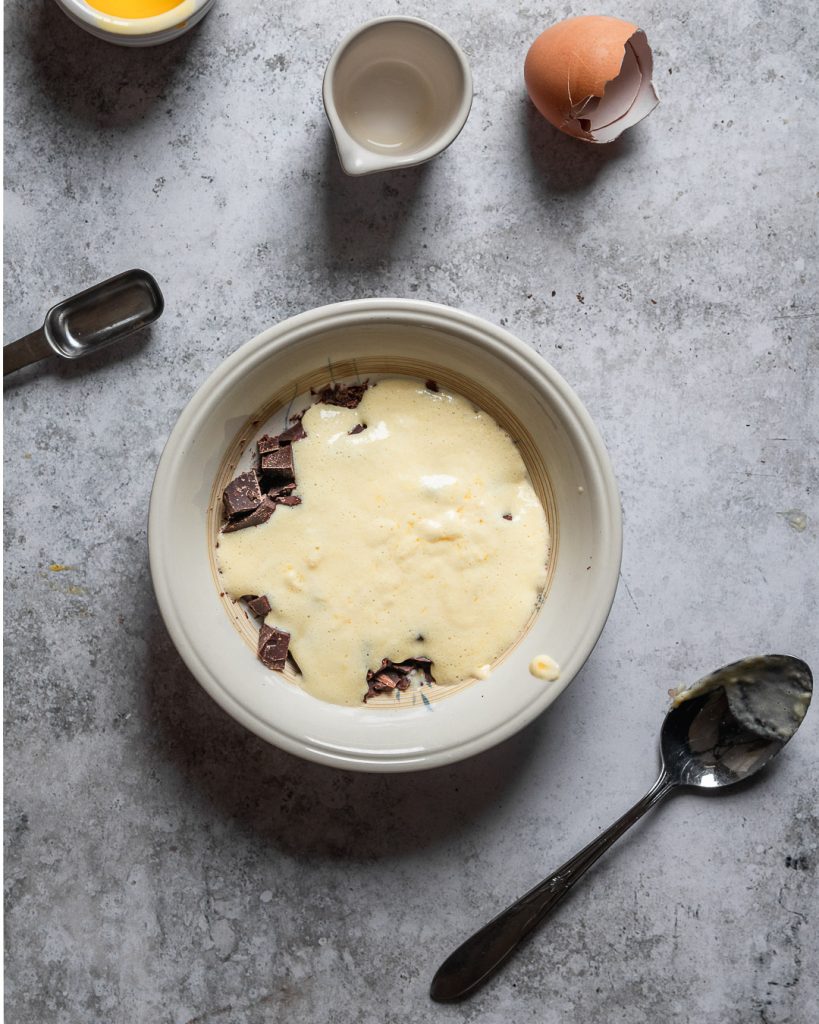
#5. Melt the chocolate
Pour all the anglaise cream while warm over the finely chopped chocolate. Mix with a spatula to melt all the chocolate.
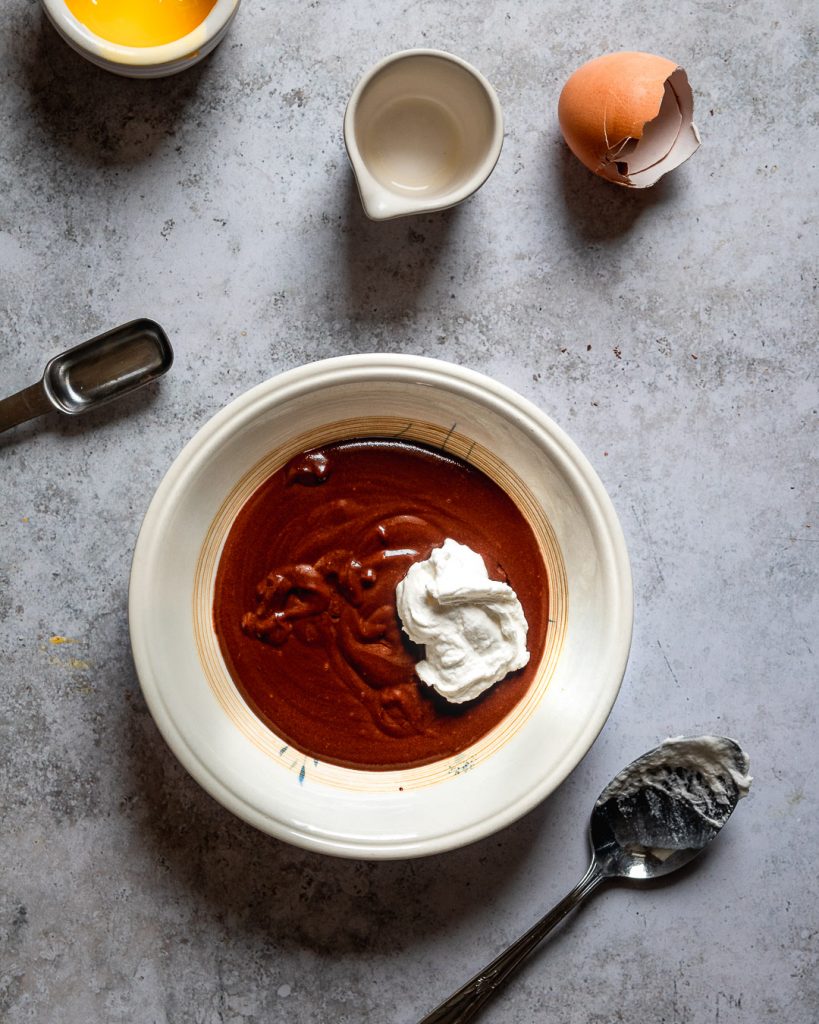
#6. Whip remaining heavy cream & fold in
Whip the remaining half of heavy cream to stiff peaks, then fold it into the melted chocolate!

How to Store & Set Chocolate Mousse
Wasn’t that easy?! Okay now for the hard part…waiting for it to set.
1. Use clean sterile glass jars – There’s something irresistible about a jar of chocolate mousse. Pour the mixture into your glass of choice.
2.Cover with wrap – Cover with cling wrap, before adding the lid. This is especially necessary if you are making ahead.
3.Chill in the fridge – Since we used the anglaise method, this mousse sets in a minimum of 30 minutes! So fast!
If you want to make ahead, Chocolate Mousse can be made up to 3 days in advanced, just make sure you seal it tightly and store in the fridge. Optionally, you can store it in the freezer for up to 2 months. Just let it thaw over night in the fridge before serving.
Ta-Da! The easiest and most delicious chocolate mousse! While this is delicious as is, did you know you could add chocolate mousse to cakes?! It’s so decadent and even better than cream! See how I used it in this Chocolate Heaven Citrus Gateaux!
Happy Baking!
Sharon
Make sure to tag me on Instagram @whiskfullyso and leave a review below if you made this recipe. I hope you loved it! For more delicious ideas follow me on Pinterest.
30 Minute Chocolate Mouse
Ingredients
- 236ml (1 cup) heavy whipping cream
- 30ml (2 tbsp) milk
- 36g (approx. 2) egg yolks
- 3g (2 tsp) granulated sugar
- 60g 66% dark chocolate finely chopped
Instructions
- Put 177ml (¾ cup) of the heavy whipping cream in a saucepan and bring to a low simmer.
- Meanwhile, in another bowl, whisk the egg yolks and granulated sugar (or coconut cream for vegan) together until combined.
- When the milk has simmered, stream into the whisked egg mixture while whisking continuously.
- Pour the combined eggs and milk back into the saucepan and cook over low heat, whisking continuously, until thick enough to coat the back of a spoon about 180-183°F. Check by coating the back of a spoon, and running a finger through the mixture. The texture should be thick enough that the mixture coats the back of a spoon and holds its structure when you swipe your fingertip across it.
- Remove the pan from the heat, and let it cool slightly until comfortable to touch. Pour into a bowl filled with the chopped chocolate. Mix with a spatula until smooth
- Whisk the remaining 59ml (¼ cup) of heavy cream to stiff peaks, then carefully fold into the chocolate mixture.
- Pour the chocolate into clean glass containers, cover and chill in the fridge for 30 minutes or more to set.
Notes
- For a vegan version: sub the 2 egg yolks for 1/4 cup of coconut cream.


Just made these last night and let me just say, this chocolate mousse is incredible. Almost like a bite of heaven, it is creamy, chocolaty, airy and absolutely perfect. Just like Sharon says, it truly is chocolate on steroids (that made me crack up) and that’s all the more reason to try this recipe out!
Thank you! I’m so glad you’re onboard this chocolate mousse train!