


From messy to beautifully arranged, here are the 10 easy steps you need to style and photograph salads like a pro!
This is part 3 in my “How to Style…” series where I show you how to style everything from chicken to brownies! Part 1 was all about styling chicken breast, read that post here, and part 2 was about simple cakes – read all about that here!
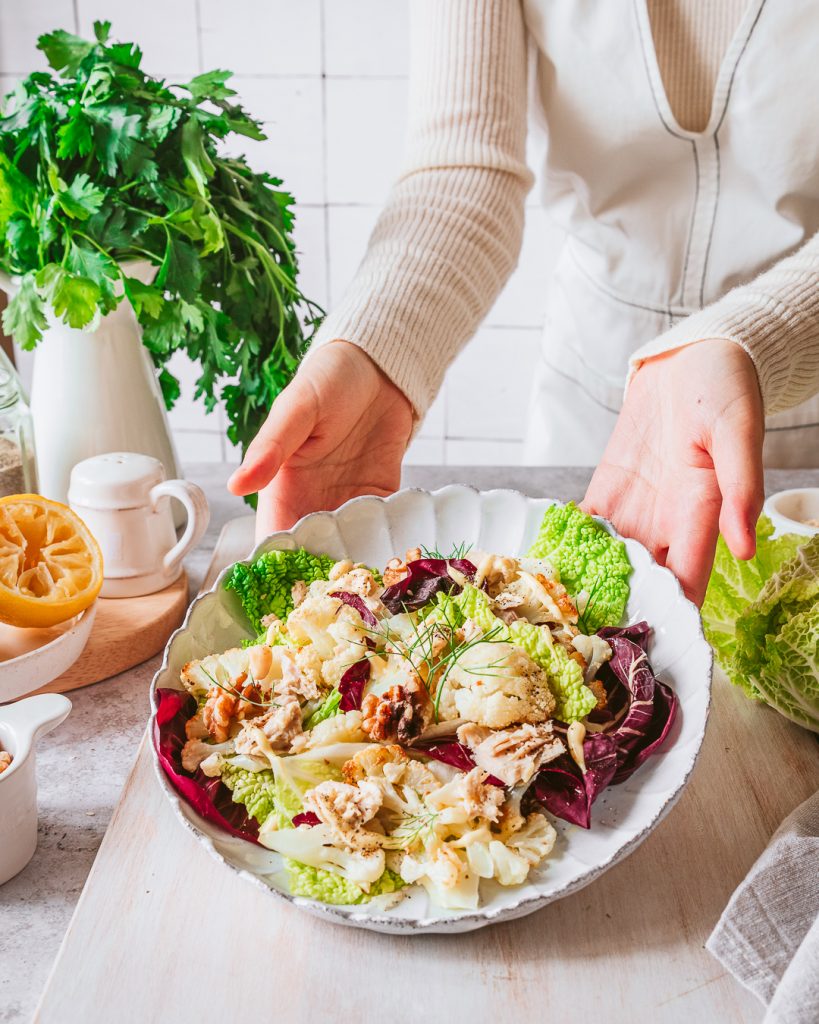
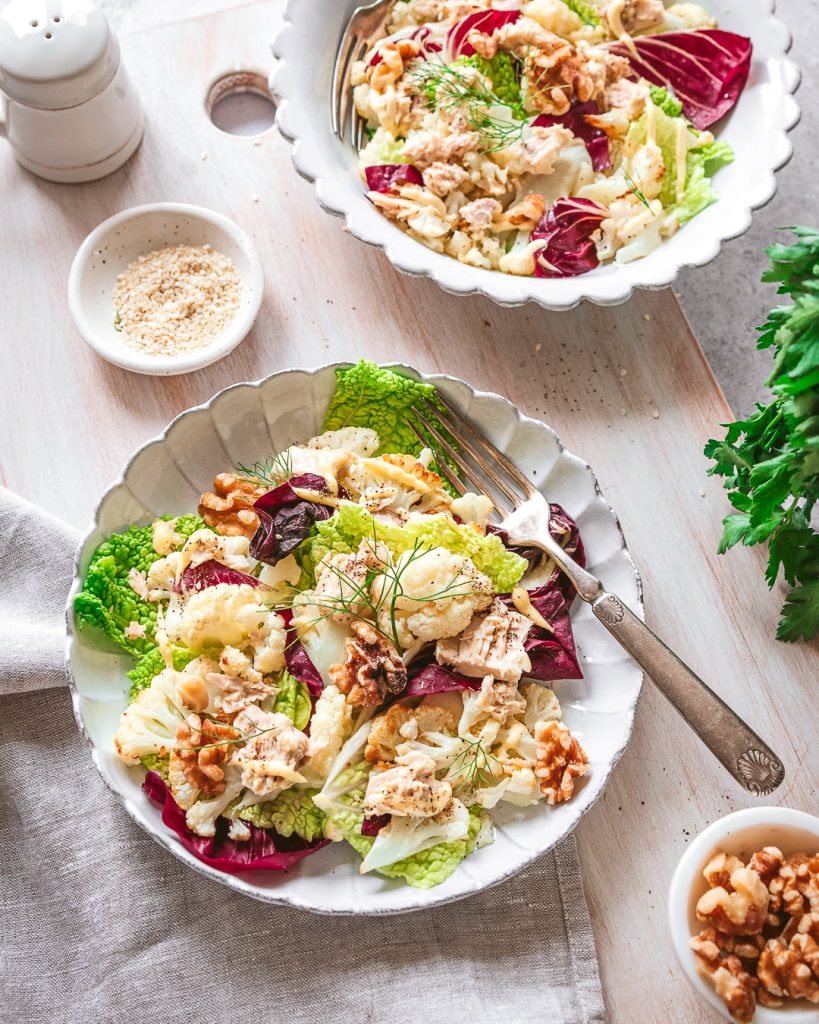
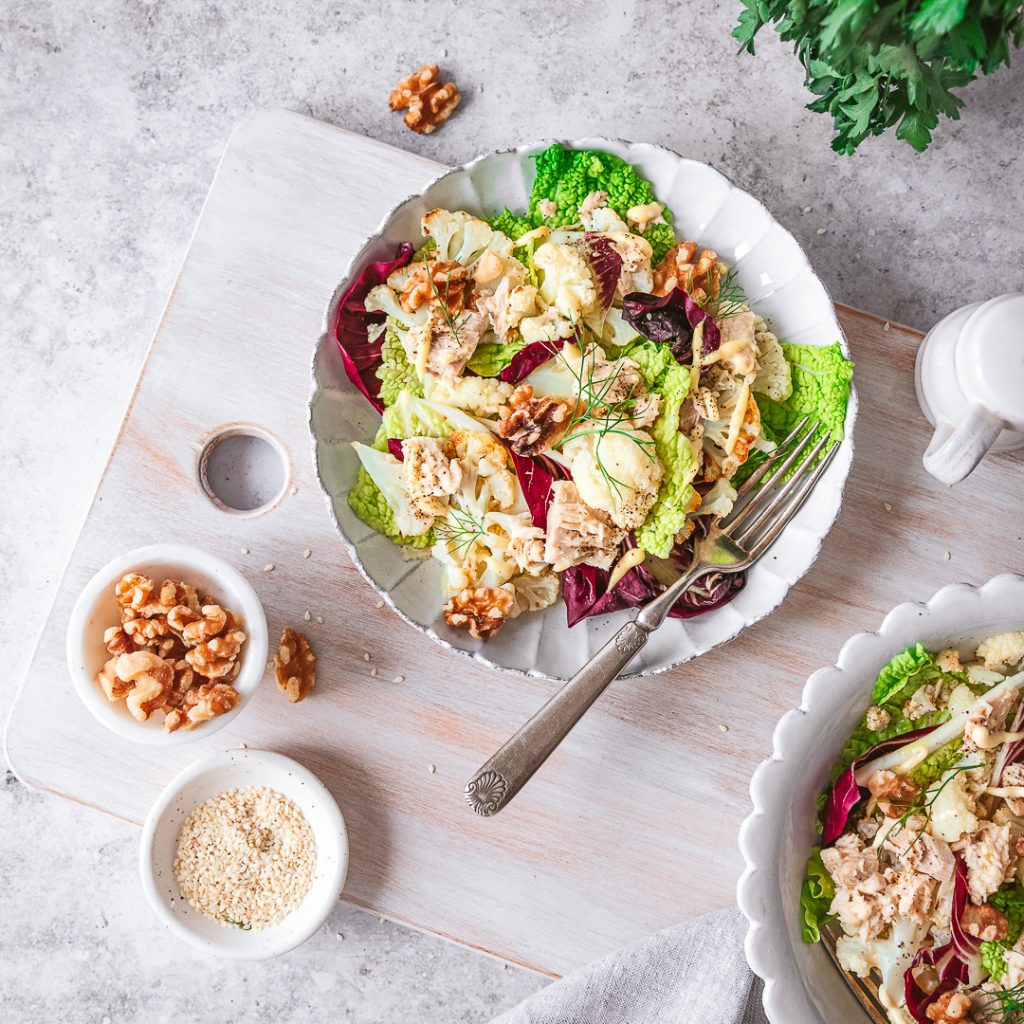
The recipe pictured in these photographs is a Shaved Cauliflower Salad with Smoked Whitefish, Mayo, Lemon, Radicchio & Herbs by Abra Berens in her cookbook “Ruffage”.
Why styling salads is not so difficult after all
I’m going to start off this post by saying I UNDERSTAND how you feel! I was always intimated by the idea of styling and photographing salads because it could easily end up looking like a big bowl of wet greens – Tasty…but visually not so pretty.
But when I started this series, I knew I would have to tackle this fear, so I did…and let me tell you, styling and photographing salad is not tricky AT ALL! Here’s why:
- More ingredients to work with – For once, there’s plenty of ingredients to place into the scene. Simpler dishes are actually more tricky to style because I need to rely more on props to fill out the scene.
- It’s similar to plating a salad to eat – Unlike other subjects, I assembled the salad pretty similarly to how I would eat it, except with a few extra considerations.
With all that said, let’s dive into the nitty-gritty of how I styled this salad! Get your notebook ready!
I don’t use anything fancy for styling, but there are some tools I recommend. You can check them out here!
Watch the video below to get a behind the scenes look at how I styled this Cauliflower Salad!
Step #1 – Determine your Color Scheme
This is the MOST CRUCIAL STEP, and determines whether your salad looks like a pile of green mush or a beautiful piece of art! A Salad can have so many ingredients of different colors, so be aware of how all the ingredients look together. You’ll also notice, that my salad is the most vibrant element in my photos, and no other props are fighting for attention from the camera.
Step #2 – Start Fresh
If you want your salad to look its best, don’t use those leftover wilted greens from last week. Always use ingredients that are as fresh as possible. That freshness will then be captured on camera without you having to add any crazy additives.
PRO TIP – Certain greens like asparagus, celery, peas (anything that won’t wilt) can be brightened up quickly by steaming for 1-2 minutes. Beware you don’t over steam though, or they’ll become soft and loose their crisp look.
Step #3 – Let the light in
When selecting the dishes for your salad to rest in, I would stay away from deep bowls. Instead select wide plates with lower rims, this way the bowl itself won’t create deep shadows that can cover your subject. In these photos, I actually used a dinner plate since it has lower rims.
Step #4 – Deconstruct to Construct
Now you’re ready to begin plating! When you’re in doubt about how to style a salad, deconstruct the recipe. When making a salad, you’ll always add your greens first. This is because they are the ingredients you’ll need most of! The same applies when styling.
Step #5 – Add Texture
To make sure your ingredients stand out from one another, consider how they are presented. Will you chop your greens? Shave them in ribbons or will you dice them? In this way, you add a variety of shapes and texture to your dish.
Step #6 – Dress where it matters
This step is what differentiates a salad from being eaten to being photographed. Typically when making to eat, you will heavily dress a salad, and toss it all together. When photographing, you want to LIGHTLY dress to prevent sogginess. Lightly toss the salad in dressing using either your hands or tongs. You may decide to not dress the entire salad at all (like I’ve done) and only selectively add dressing on areas you want to highlight.
PRO TIP – For even more control over your dressing, use a pipette.
Step #7 – Don’t forget the garnish
When styling and photographing salads, garnishes are what elevate the dish and give it dimension. Use the garnishes to show off different textures, and mouth feels. Cheeses like ricotta, mozzarella balls are great because they are small but give freshness to a dish. Also consider using spices, and herbs. Just make sure all your garnishes make sense flavor-wise to the dish.
Step #8 – Less is more
Lastly, remember that less is always more! Smaller portions always read better on camera, so don’t overcrowd your salad or the scene with extra props that don’t have purpose. Instead, let your salad be the main subject and intentionally place each element to tell a more concise story.
So what do you say? Are you ready to kick-butt and style salads?
I’m always opening to hearing what you want me to cover next in this series, so comment below!
Till next time! Sharon
Make sure to tag me on Instagram @whiskfullyso and leave a review below if you found this post helpful. I hope you loved it! For more delicious ideas follow me on Pinterest.


Read the Comments +