


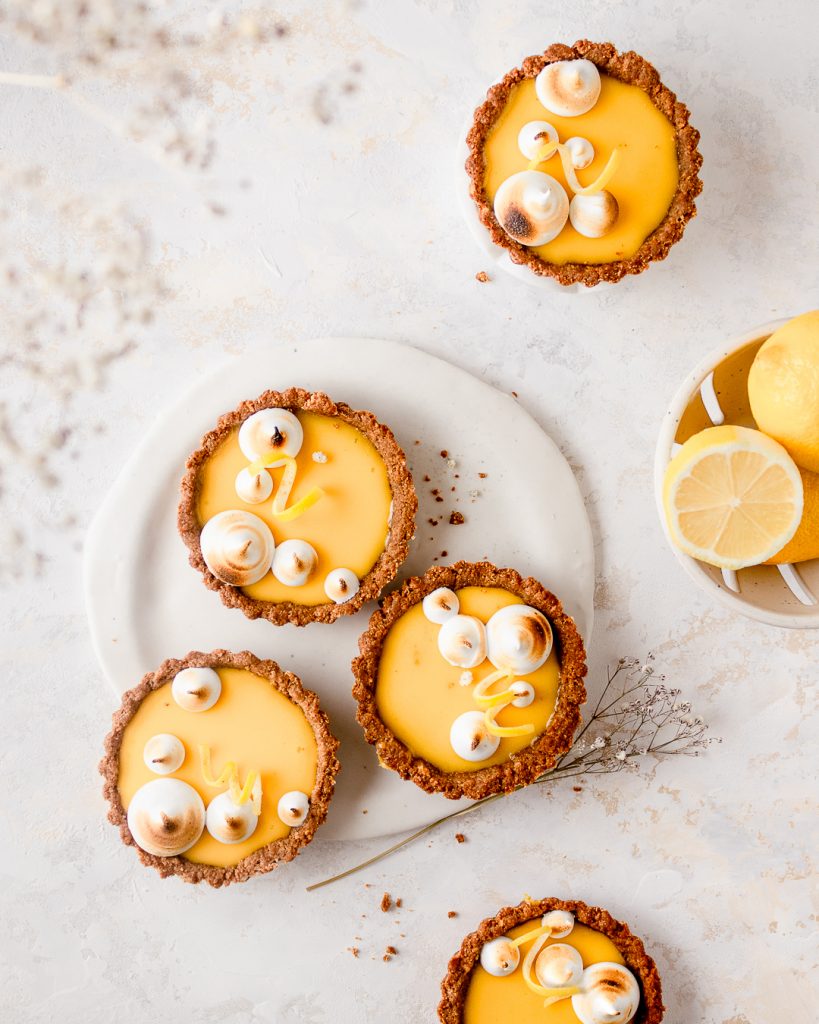
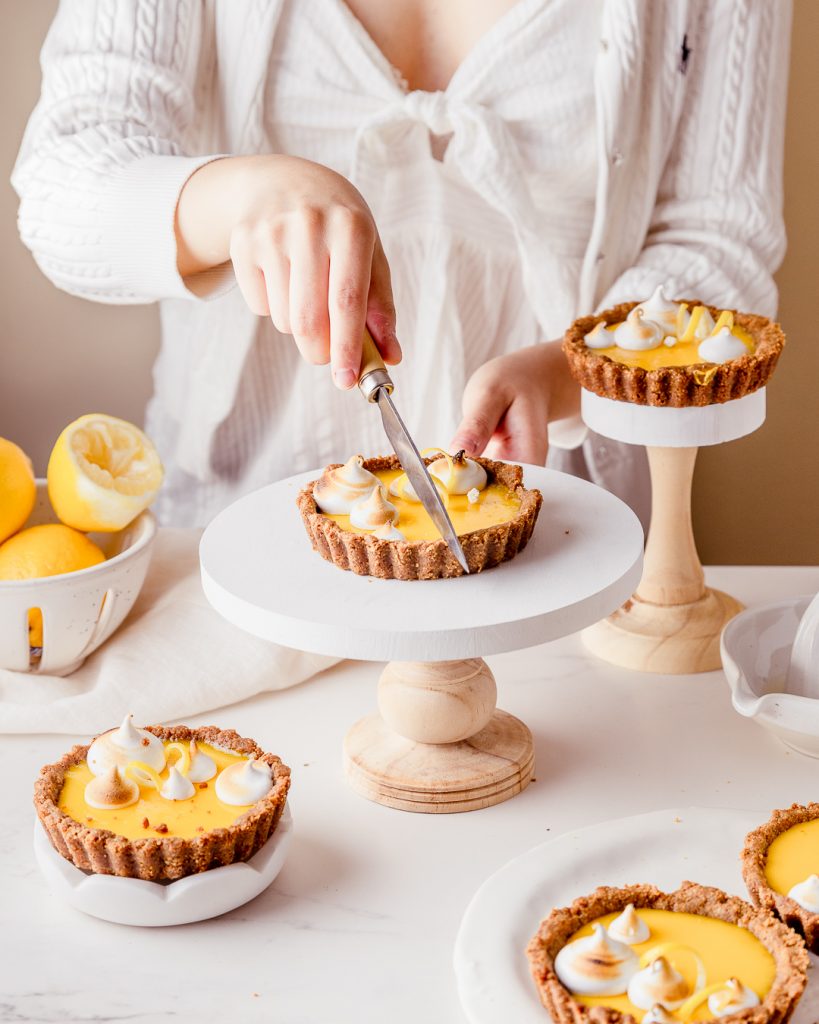
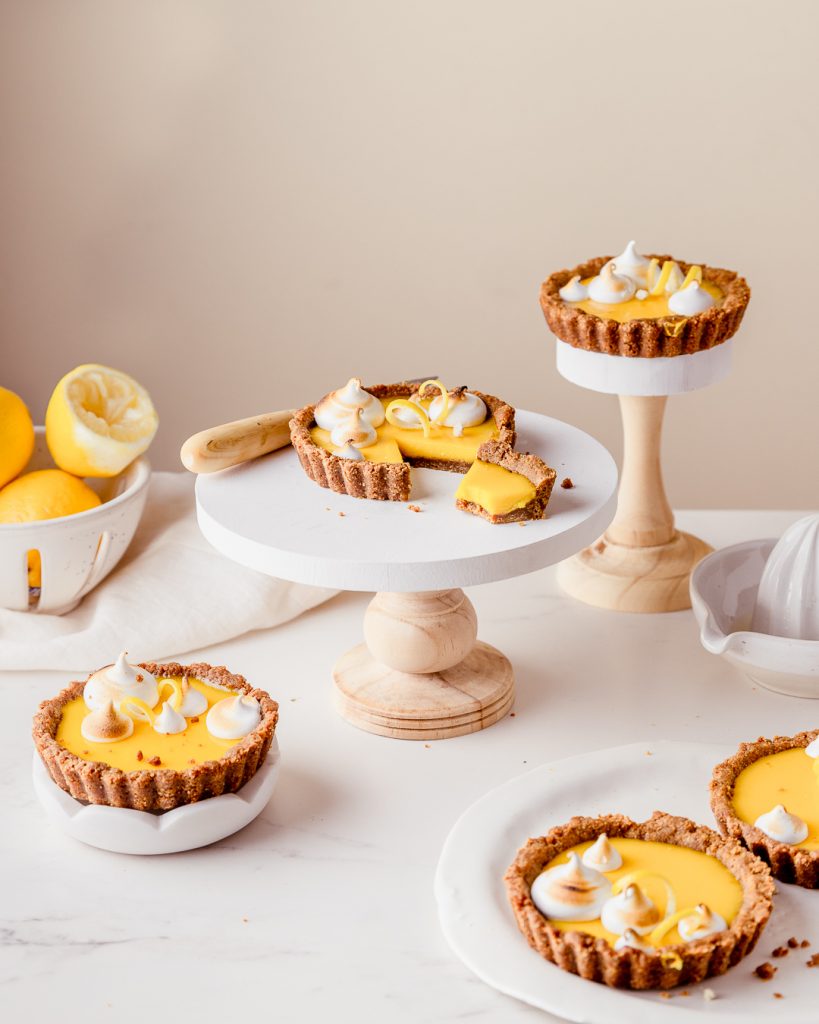
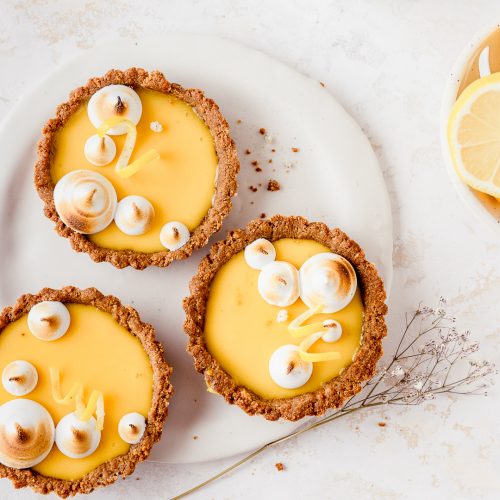
Summer in a bite, this Yuzu Lemon Tart has a sweet and salty graham cracker crust, a creamy all-natural lemon filling, and a torched meringue. AND it gets better! The filling is a no-bake, so all you have to do is make the tart, fill it up, and let it chill while you enjoy a class of lemonade!
Okay, enough chit chat, let’s get baking!
Everything you need to know about this Yuzu Lemon Tart
YIELD: This recipe makes 6 small tarts or 1 large 9 inch tart.
METHOD: There’s two main components in these Yuzu Lemon Tarts: 1) the shell; and 2) the filling. More details and steps on this below!
TEXTURE: Biting into this tart is a harmonious experience of snappy shattering crust, that’s softened by a mousse filling and fluffy clouds of toasty meringue.
FLAVOR: You’ll be doing a little dance while you eat this because the Yuzu lemon is like a rain of sunshine! Coupled with the salty taste of graham crackers and Lotus Bischoff crust it’s a winner!
LEVEL OF DIFFICULTY: Intermediate. Unlike regular pie crusts, this tart crust is very easy, but the filling requires some watching, so just make sure you’re not multi-tasking 5 things while baking this.

wait…What is a Yuzu Lemon? What does it taste like?
In my humble opinion, the Yuzu lemon is the Queen of lemons. I first discovered this lemon in Japan, and I was forever changed. American lemons (beside Meyer), can frankly be quite sour, but a Yuzu lemon isn’t just one note. If a grapefruit, clementine, and a lemon had a baby, it would be a Yuzu lemon. It’s intensely fragrant, sweet and sour.
Unfortunately, due to agricultural laws, fresh Yuzu lemons cannot be imported into the USA, BUT you can easily find Yuzu extract at asian grocery stories. This concentrate is even better for baking and cooking.
Can I substitute Yuzu lemons with regular lemons?
Technically yes, but keep in mind the flavor of Yuzu lemon is SO different (it’s amazing), and by using regular lemons, you’re making regular lemon tart.
If you do want to substitute for regular lemons, use lemon extract for a 1:1 substitution. If using freshly squeeze lemon juice, you will need more to get an intense lemon-y flavor. You’ll also have to increase the amount of gelatin so the filling isn’t watery.
Ingredients & equipment to make Yuzu Lemon Tarts
INGREDIENTS:
- Graham Crackers & Lotus Bischoff Cookies – These two fan favorite cookies form the base of this tart. You can go all graham (I like Honey Maid the best) or all lotus, but the caramelized mocha taste of the lotus add extra dimension to the flavors of this crust.
- Brown Sugar – For additional sweetness.
- Unsalted Butter – This will bind the crushed crackers together to form the crust.
- Yuzu Extract – This can be found at speciality baking suppliers, on Amazon, or any Japanese/Chinese grocery store.
- Whole Eggs and yolks – The filling is custard based so the results are smooth and creamy.
- Lemon Zest – Primarily for decoration and additional flavoring, you can use regular lemons for this.
- Gelatin Sheet or Powder – This is a crucial ingredient for holding the filling together. I personally prefer gelatin sheets, because they don’t have any after taste, and are easier to bloom (more on blooming below”.
special equipment:
Immersion blender or strainer – To finely cream the filling so it’s extra smooth. Here’s one with additional attachments too.
Mini Tart Rings or 1 large 9″ tart pan – Either work well for this recipe, I recommend a tart pan with a removable bottom.
How to make theses Yuzu lemon Tarts
The Italian Meringue topping is completely optional, but I highly recommend it because 1) it’s pretty, and 2) it really tastes amazing with this tart.
How to Make a graham cracker crust
STEP #1 – Make the crust: Combine all the crust ingredients in food processor, and pulse away until a fine crumb forms, and holds together when pressed.
STEP #2 – Blind Bake: Since the filling is a no-bake, you’ll have to pre-bake the crust (a.k.a blind baking). Press the crust into your tart pan(s) and pack it tight. TIP: use a measuring cup to press the crust in.
How to bloom gelatin
Blooming gelatin ensures that it incorporates smoothly into the bake. Regardless of whether you use sheet or powder gelatin, you’ll need to bloom it to activate. Here’s how to activate both:
Blooming Sheet Gelatin – Submerge the gelatin sheet in a bowl with lukewarm water, and let it sit for 5 minutes. Then scoop the sheet out, squeeze out the excess water, and follow the rest of the recipe steps.
Blooming Powder Gelatin – Sprinkle the gelatin powder over a shallow bowl filled with 2 tbsp of luck warm water. Once it’s congealed slightly, follow rest of recipe steps!

How to make the Yuzu lemon Tart Filling
STEP #1 – Temper the eggs: To make the filling, you’ll need to slightly cook the eggs by tempering them with a warm liquid (in this case the Yuzu juice) to avoid curdling the filling.
STEP #2 – Add the gelatin – To full set the gelatin in the filling, you’ll add it, then simmer slightly to dissolve.
STEP #3 – Fill Tarts & Chill – Blend or strain the filling to remove lumps, then fill up your tart shells, and chill so the filling sets.
Tips for making a delicious Yuzu Lemon Tarts:
- TIP #1: Finely crush the tart crackers – in order for the tart to hold its shape, you’ll need a fine crumb. If you don’t have a food processor, you can crush the crackers in a bag with a rolling pin. Just be patient and make sure it’s like sand.
- Tip #2: Cook the filling slowly – To avoid the filling from curdling, cook it slowly over lower heat.
- Tip #3: Immersion Blend to remove lumps – there’s nothing worse than a lump filling, so giving it a whiz with my immersion blender makes this filling perfectly smooth.
These Yuzu Lemon Tarts are one of my favourites recipes I’ve ever made, and I hope you enjoy it too! There’s so many ways to use Yuzu, so comment below on how you’d use it!
Till next time, Sharon
Make sure to tag me on Instagram @whiskfullyso and leave a review below if you made this recipe. I hope you loved it! For more delicious ideas follow me on Pinterest.
Summer Yuzu Lemon Tarts
Ingredients
for the Graham Cracker Lotus Bischoff Crust
- 1 cup (125g) Graham crackers
- 1 cup (125g) Lotus Bischoff Cookies
- ½ cup (70g) Brown sugar
- ¾ tsp (3g) Fine sea salt
- ¾ cup (168g) Unsalted butter melted
For the Yuzu Lemon Filling
- 50 g granulated sugar
- Zest from 2 small lemons can be any lemon type
- ¼ cup (60g) lemon juice can be any lemon type
- 45ml (3 tbsp) Yuzu Extract
- 100g (approx. 2) whole eggs
- 60g (approx. 2) egg yolks , reserve egg whites for Italian meringue topping
- 50g unsalted butter , at room temperature
- 1 Gelatin sheet or 1 pouch of Gelatin (approx. 2½ tsp or 7 g)
for the Italian meringue decoration
- 60g (approx. 2) egg whites
- 75g granulated sugar
- 21 ml water
- 1/2 tsp vanilla extract
Instructions
for the Graham Cracker Lotus Bischoff Crust
- Preheat your oven to 350°F and lightly grease your chosen tart pan with non-stick spray or a light coating of butter.
- Place the graham and lotus bischoff crackers into a food processor and finely pulse until it resembles fine sand. Alternatively, place in a plastic bag and crush using a rolling pin.
- Place the fine crumbs into a medium-size bowl along with brown sugar, salt and whisk together before adding melted unsalted butter, mixing together until a wet sand mixture forms that holds together when pressed.
- Press into 6 small tart pans or one larger 9” pie pan evenly, using the bottom of a flat cup to pack together. Bake the crust at 350°F for 10 minutes. Set aside to cool completely.
For the Yuzu Lemon Filling
- Bloom the gelatin (either powder of sheet) according to methods outlined above in the blog post or by following instructions on the packed. Set aside.
- Rub together half of the granulated sugar with the lemon zest in a sauce pot to release the oils from the lemons. Add in lemon juice, Yuzu extract and bring to a simmer on low heat.
- In another bowl, whisk the whole eggs, egg yolks, and remaining granulated sugar until smooth. Temper the eggs, by adding half of the simmering lemon syrup into the egg mixture while whisking to fully combine.
- Return the egg/lemon syrup mixture to the saucepan and continue to cook the curd over low heat for another 5 minutes (never boiling) or until thickened and falls off the whisk in ribbons. Be careful not to cook on high heat or it will curdle. Add in either the bloomed gelatin sheet or thickened powdered gelatin, and whisk to cook until fully dissolved.
- Immediately remove the pan from the heat and strain into a pitcher. While still warm whisk in butter and salt, until fully combined. Additionally, (not mandatory but recommended) use a hand-held immersion blender and blend to remove lumps. TIP: when using an immersion blender put the blender fully into the mixture to avoid splattering.
- Divide the filling amongst the cooled tarts and lightly tap each tart on the counter to smooth out any air bubbles. Lightly cover the top with cling wrap and chill for 4 hours or overnight until the filling is set.
for the Italian meringue - make when ready to serve
- In the bowl of a stand mixer fitting with a whisk attachment or with a hand-held mixter, whisk the egg whites in the bowl of a stand mixer on low speed until frothy and soft peaks form.
- While the egg whites are mixing, combine granulated sugar and water in a saucepan over medium heat and heat on medium low until it reaches 249°F/ 121°C. Lower the stand mixer speed to low to avoid the hot sugar from splattering up, and slowly pour the boiling sugar syrup into the bowl of whisking egg whites.
- Once all the syrup is added, add vanilla extract and return the machine to high speed and whisk for 2-3 minutes or until the bowl of the mixture is only slightly warm and stiff peaks form. *Check continuously to make sure you don't over beat. Spoon into a piping bag fitted with a round nozzle, and decorate your chill tarts. Use a blow torch to crisp the edges of the meringue topping.
Notes
- These tarts are best enjoyed immediately once set; however, if need be, they can be eaten up to 2 days prior to making.
- The tart shells can be made up to two days ahead, but the filling sets quickly so use it once made.


Read the Comments +