


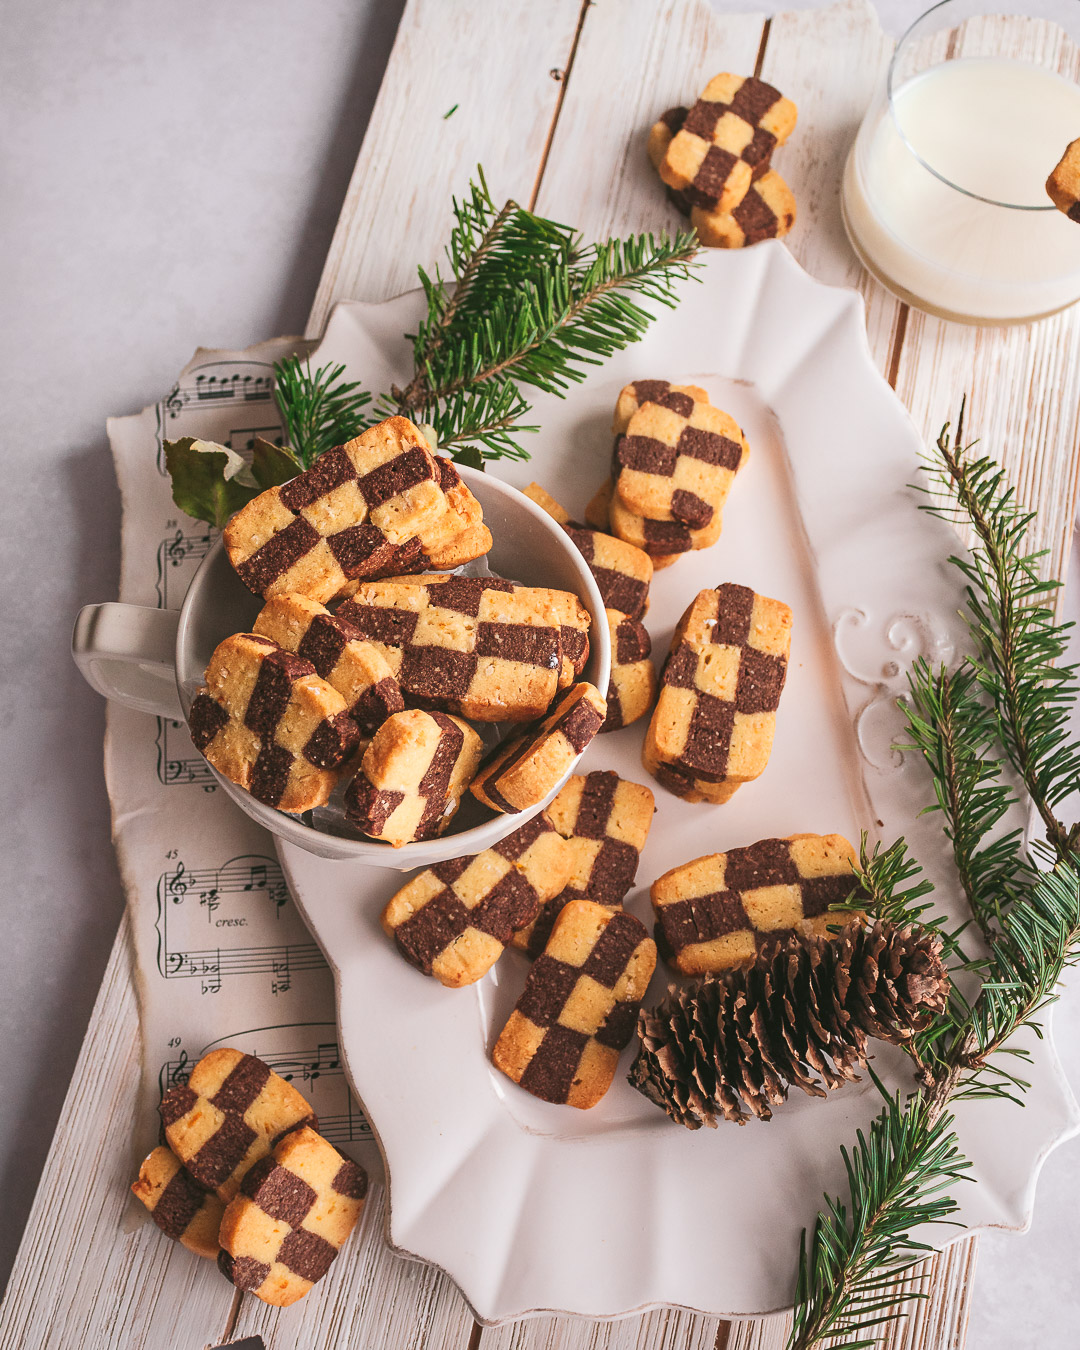


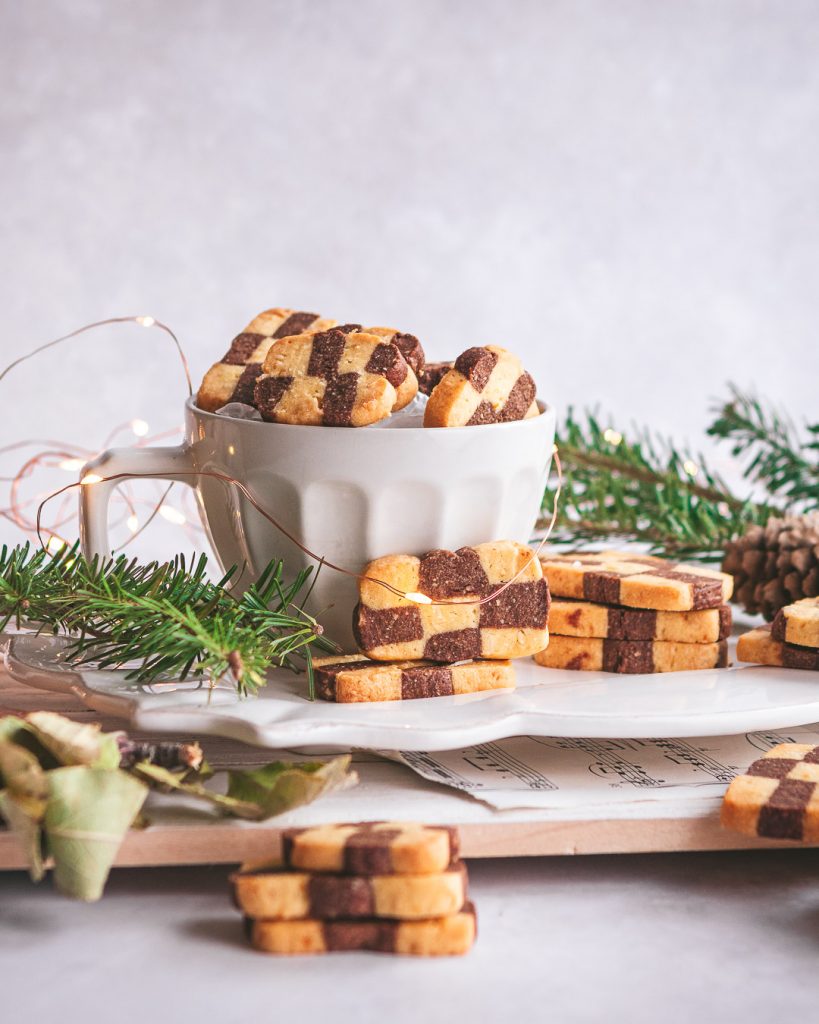
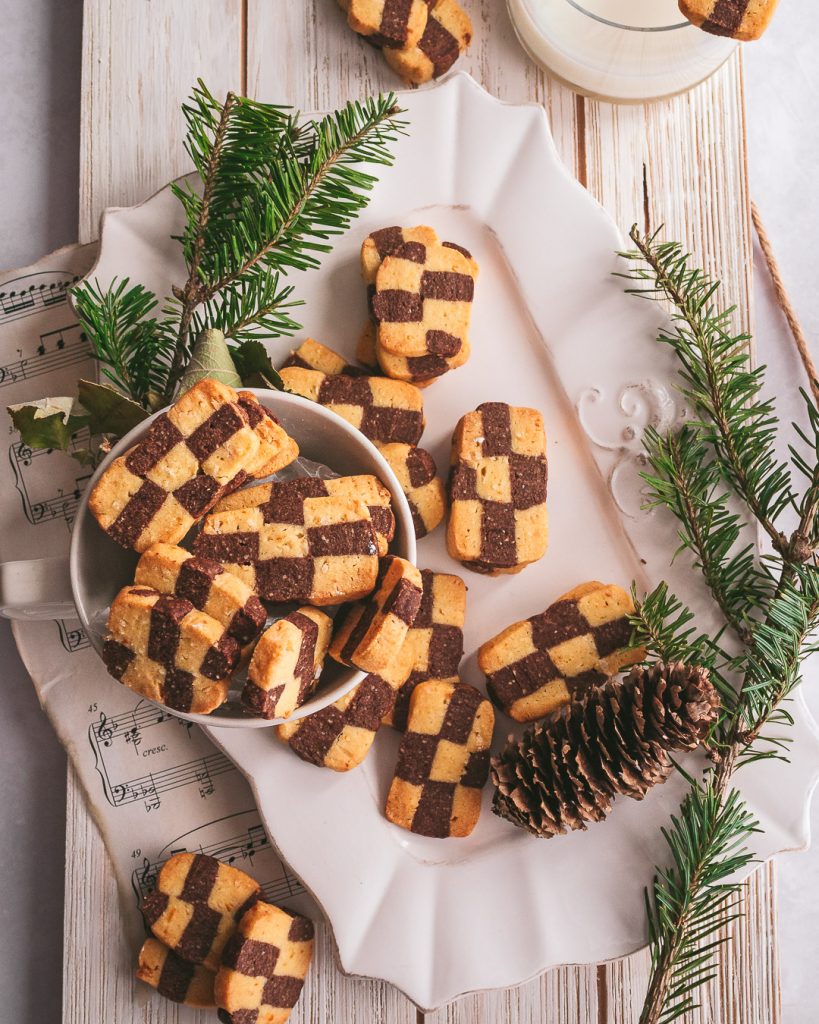
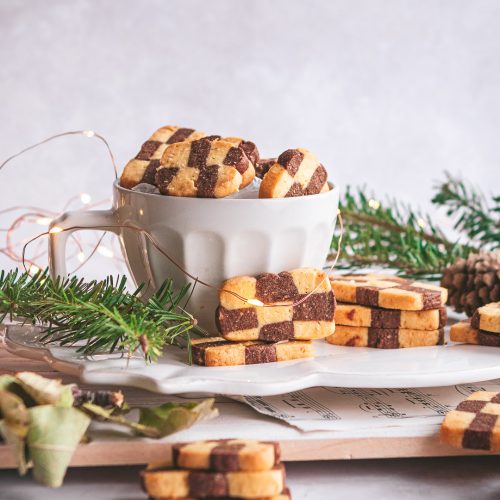
Whimsical slice-and-bake, Chocolate Orange Coconut Checkerboard Cookies using one basic dough to get two flavors: chocolate and orange coconut.
With their bittersweet flavor, and melt-in-your-mouth texture, these cookies are sure to impress! Not sure how to form the checkerboard pattern? Don’t worry I’ve got tips to tricks to ensure you get the cutest cookies!
This recipe is part of the 2020 Holiday Cookie Box! Click here to see the other flavors!

All the details in these Chocolate Orange Coconut Checkerboard Cookies
YIELD: This recipe makes 20 cookies if each is sliced 1/4 inch thick.
FLAVOR: Traditionally, checkerboard cookies are flavored chocolate and vanilla, which is fine, but taking advantage of the fact you can combine 2 amazing flavors together, I combined 2 of my fav flavors from this year’s 2020 Holiday Cookie Box: Chocolate and Orange Coconut. (You can find the original recipes here and here.)
TEXTURE: These Chocolate Orange Coconut Checkerboard cookies are slice-and-bake cookies aka ice box cookies. Called so, because the cookies are “sliced” not scooped into their shape, and are perfect for stashing in the freezer for whenever you have a craving. Sliced at 1/4 inch thick, these have crispy edges and soft centers.
LEVEL OF DIFFICULTY: Creating the checkerboard pattern, can be a little tricky, but as long as you use a ruler for precise measurements it really is easy! For more detailed instructions keep reading!
How do I make the 2 flavors in checkerboard cookies?
The magic behind this visually impressive cookie yet simple process is behind the dough. The base is a classic vanilla butter cookie, but the dough is separated in half and flavored at the very end. The chocolate cookie recipe I reference uses real chocolate, but this one uses cocoa powder so it can be added at the end.
There are so many ways of shaping the dough, if the checkerboard is intimidating, you can even layer the doughs and roll them into a pinwheel.

How to shape Checkerboard Cookies
A ruler and a sharp long (non-serrated) knife will be your best friend, so make sure you have both!
1.Shape into logs: After you make both doughs, form them into 12 inch long logs that are 2 inches long and 2 inches wide.
2.Chill: This step is so important to relax the dough and also harden it enough to be pliable to bend into shapes, but also prevent stickiness. Chill for a minimum 0f 30 minutes but no longer than 2 hours.
3.Divide into strips: Remove doughs from fridge and slice each log lengthwise into 3 even strips, then into thirds again. You should have 9 thing strips from each block of flavor.
4.Create checkerboard pattern: Place an orange coconut strip onto your work surface, and line up a chocolate strip next to it, and another orange coconut after. Use your finger to brush the sides where the flavors connect with egg wash (this will “glue” the strips together). Lightly press but don’t squish. On the next row, place a chocolate strip over the orange coconut, alternating flavors until you have 3 rows. Keep repeating this step until you use all the strips and you have 2 logs.
5. Chill Again: Wrap tightly and chill once more to make sure the pattern holds together.
6. Slice & Bake! Slice-off the edges to get rid of the bumpy ends, and then slice into 1/4 inch thick cookies.
(optional, but recommended) brush the edges of the cookie with egg wash, and dip into sugar to get a crunchy edge.
tips for making butter cookies
Use room temperature butter – This is essential for the chocolate orange coconut checkerboard cookies to be tender and crumbly. The foundation of this cookie is made by creaming butter and sugar, so warm softened butter will make this easier and ensure everything is incorporated.
TIP: Leave your butter out at least 2 hours before, OR place over a warm vent for 5-7 minutes.
Aim for Drier Dough – To prevent excess spreading, the dough should be on the drier side. Like pie dough that holds together when pressed.
Chill your Dough – Absolutely essential for all butter cookies, this relaxes the dough and makes it easier to roll out! It also prevents the butter from smearing and sticking to the surface. For this recipe the first chill should be at least for 30 minutes and the second for 1 hours to hold the design, but the longer the better for flavor!
Hopefully any fear you have about creating patterned checkerboard cookies is gone, and you’re inspired to try other flavor combinations!
Happy Baking! Sharon
Chocolate Orange Coconut Checkerboard Cookies
Ingredients
for the base cookie dough
- 10 tbsp (150g) unsalted butter softened at room temperature
- 1/2 cup (60g) powdered sugar sifted
- 2 tbsp (24g) granulated sugar
- 1 tbsp (15ml) vanilla extract
- 1/2 tsp (2g) kosher salt
- 2 small egg yolks room temperature
- 1/3 cup + 2 tbsp (40g) almond flour
- 1 cup (150g) all-purpose flour or cake flour
- 1+ tsp milk (to thin out batter if needed)
- 1 egg white room temperature
for the chocolate flavor
- 2 tbsp (11g) dutch-processed cocoa powder
for the orange coconut flavor
- zest from 1 small orange
- ⅓ cup (23g) coconut shreds
Instructions
for the base cookie dough
- In the bowl of a stand mixer fitting with the paddle attachment, cream softened butter on medium-low speed until smooth. Sift in powdered sugar, add granulated sugar, vanilla extract and salt. Cream until sugar is dissolved and mixture is smooth. Pour in egg yolks and mix until egg is fully combine.
- Sift in the almond flour, all-purpose (or cake flour) and fold to combine. Fold just until no streaks of flour remain. If the dough gets too tough, stream in milk 1 teaspoon at a time. Should be of pie dough consistency: holds together when pressed, but not wet.
to divide the dough
- Separate the dough evenly in half (measure with a scale) into two separate bowls. In bowl #1 add the cocoa powder, and fold with a spatula until fully incorporated. Into bowl #2, fold in orange zest and coconut shreds.
- Starting with chocolate dough, tip out onto a surface and form into a 12 inch log that is 2 x 2 inches (long and wide). Wrap in cling wrap and chill for minimum 20 minutes in the fridge or until dough is stiff. Repeat for orange coconut dough.
to make the checkerboard pattern
- Remove from the fridge, and cut each log into even thirds, then into thirds once more. You should have 9 strips for each flavor. Place one orange coconut strips onto your work surface, then 1 chocolate strip, followed by an orange coconut stripe. Brushes the edges of each strip that join another flavor with egg wash and lightly press the strips together. On the next row, place the alternate strip on top of the first row, repeat until you have 3 rows. Repeat with second block, starting with the orange coconut strip this time.
- Wrap tightly again and use your hands to gently shape the sides so the block is a square with as sharp edges as possible. Chill in the fridge for a minimum of 1 hour (up to 2 days).
to slice and bake
- Preheat the oven to 320°F, preferably, at the convection setting and line a baking tray with parchment paper.
- Remove the dough blocks from the fridge, and cut a thin slice from each end to remove rough edges. Slice each block into 1/4 inch cookies and place onto the prepped baking tray spaced 1/2 inch apart. Bake for 12-15 minutes or until the edges are golden brown
- Remove from the oven and allow cookies to cool on the baking sheet for 5 minutes before transferring to a wire rack to cool completely.
Notes
- This cookie recipe is best made with cake flour, but all-purpose is more common so it is used.
- For a gluten-free version sub all the all-purpose flour with almond flour.
- For an egg-free version try using a flax egg (cannot guarantee same results).
- Vegan butter can be substituted in.
- These cookies stay fresh for one week when stored in an air tight container.


Read the Comments +